
How to install Visual Studio Community in Windows
Microsoft’s Visual Studio Community is a powerful IDE (Integrated Development Environment) that allows you to create desktop applications, mobile applications, websites, and more.
An integrated development environment is software that developers use to write, modify, test, and debug their code. It not only makes the development experience great but also comes with a lot of useful features that shorten the development time.
Visual Studio Community is free, and for personal usage, it is more than enough. If you want to work with your team or you want to work on a major project, you may want to consider the premium version of this IDE.
Here we’ll discuss how to install the Visual Studio community edition.
How to install Visual Studio Community in Windows
To install Visual Studio Community first you need to visit Visual Studio’s official website and click on download. After downloading the Visual Studio Community installer, you need to open it and select the addons based on what you want to develop and which programming language you want to use. That is all you need to do.
Now, let’s get started.
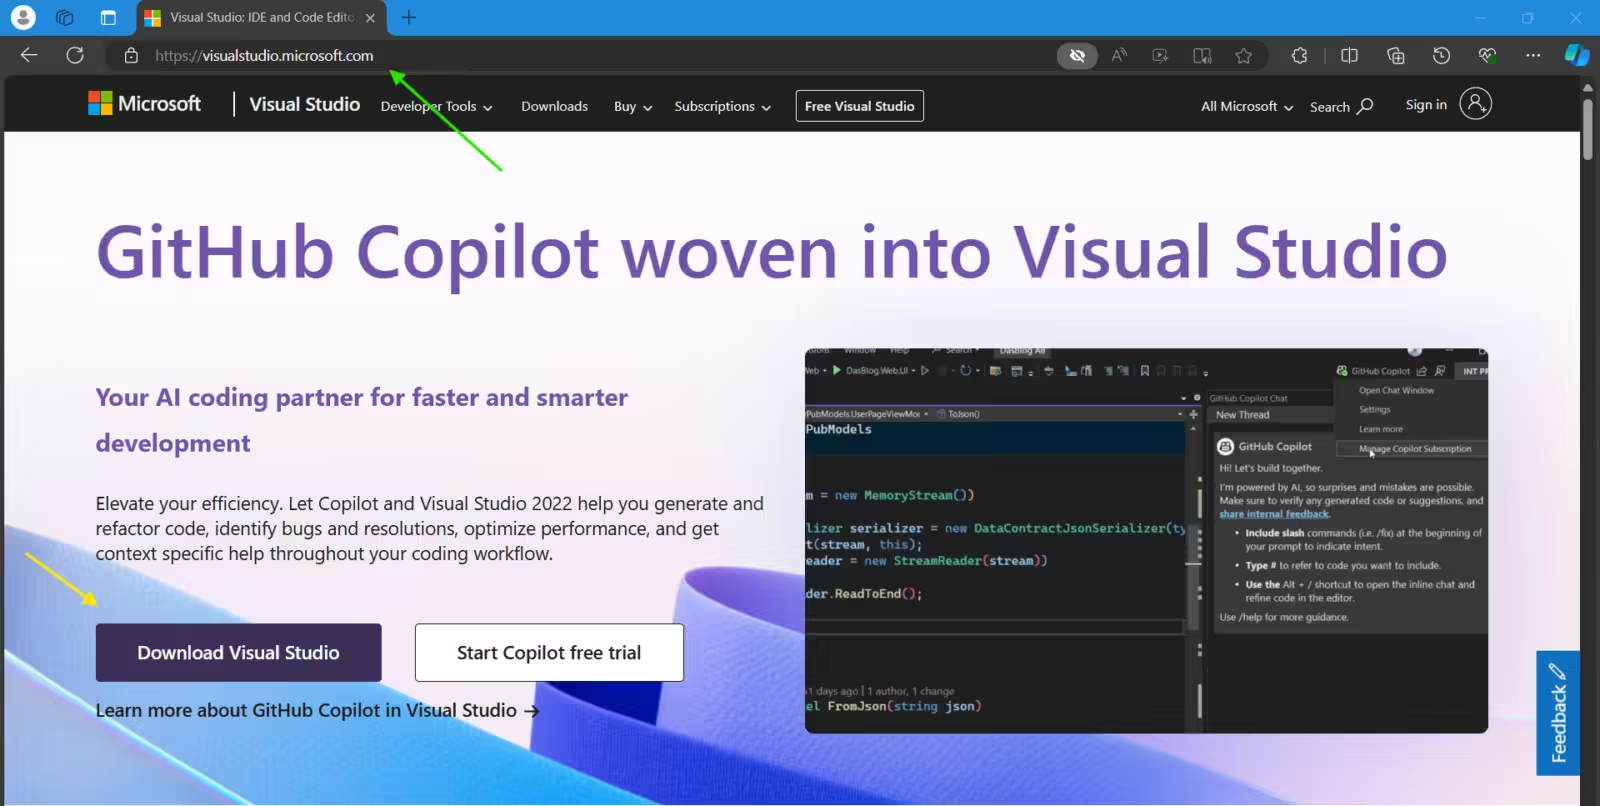
Step 1 – Go to Visual Studio’s official website to download the installer and run it
Go to Microsoft’s official website for Visual Studio i.e. visualstudio.microsoft.com and click on Download Visual Studio.
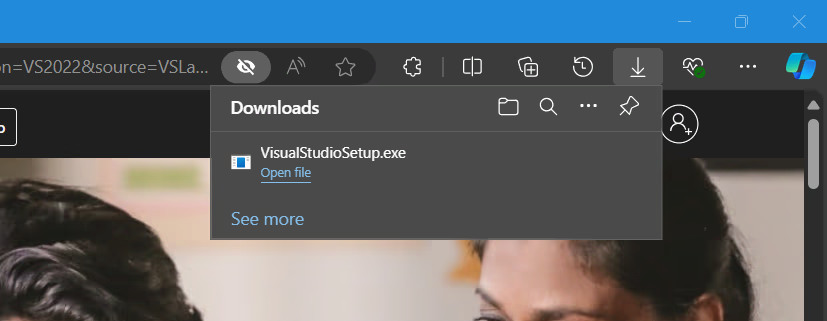
After downloading, open the file directly from your browser’s pop-up to run the installer. You can also visit your Downloads folder to open the file.
Now Windows will ask you if you want to install the program. Click yes and proceed.
After that, your Visual Studio Installer should start running. Now we’ll walk you through the Visual Studio Installer setup.
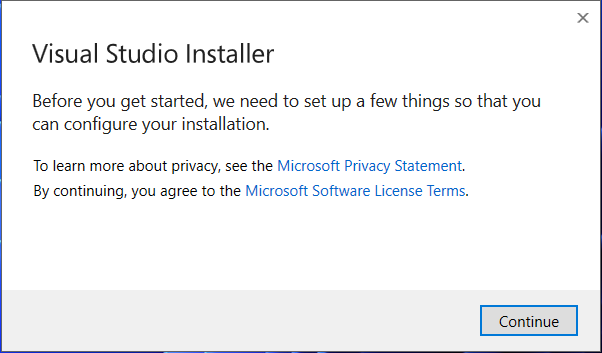
Step 2 – Start Visual Studio Installer
After opening the Visual Studio Installer click continue to proceed.
Now you’ll get many options to select from. No need to worry, we’ll walk you through what you need to install for C# programming.
In the topmost section of the installer, you’ll see
- Workloads
- Individual components
- Language packs
- Installation locations.
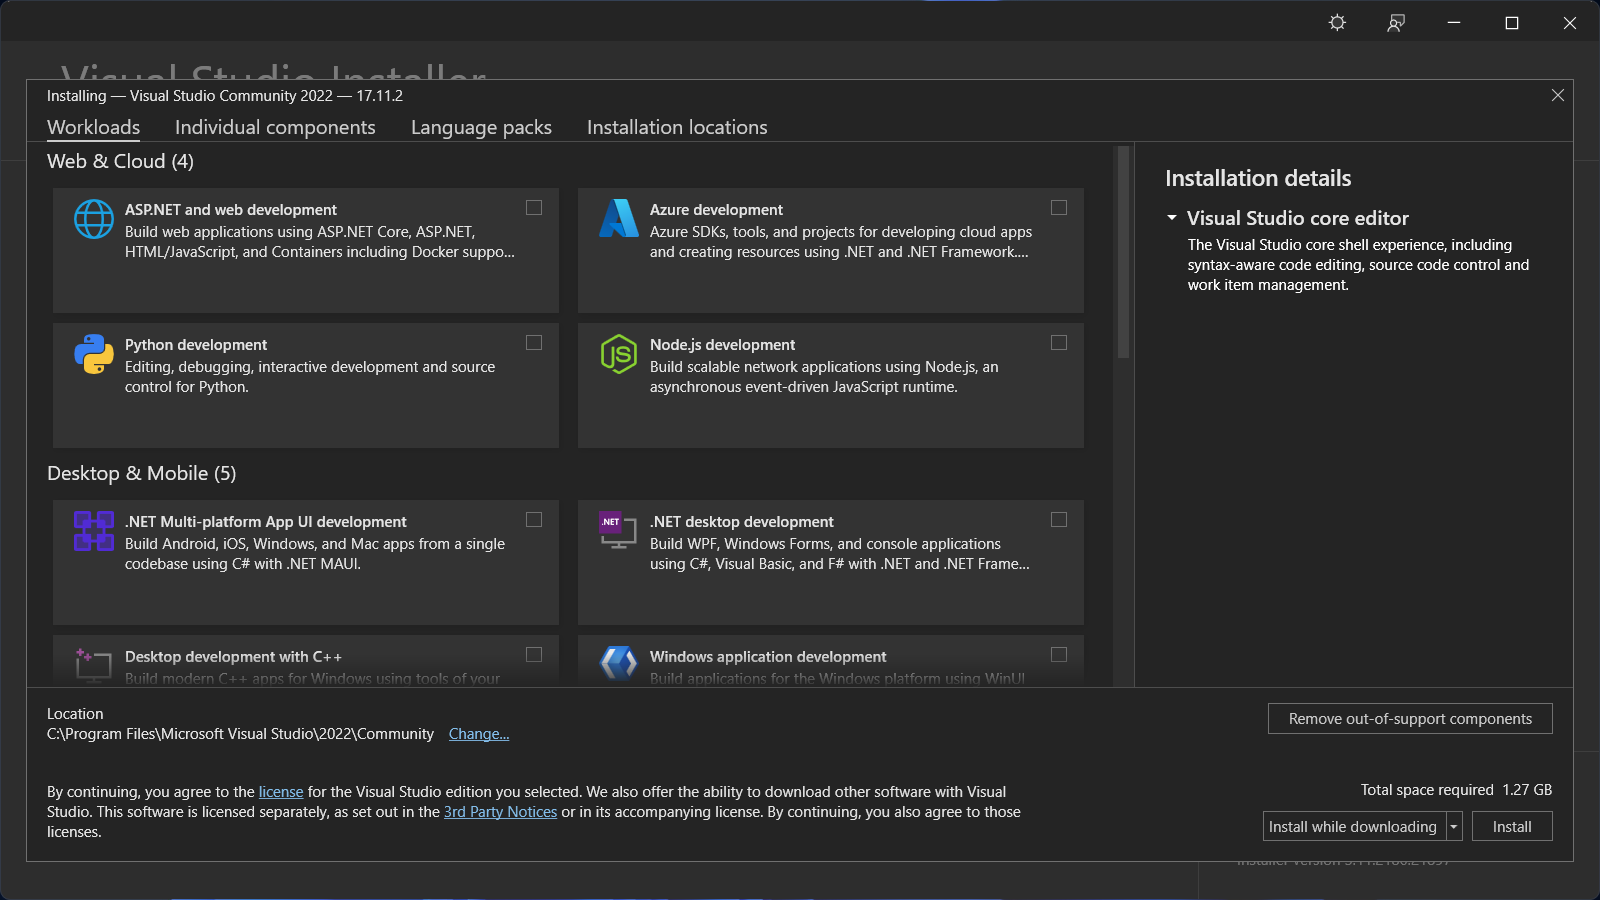
You have to select the necessary add-ons from Workloads, Individual components, and Language packs then select where you want to install Visual Studio from the Installation locations option.
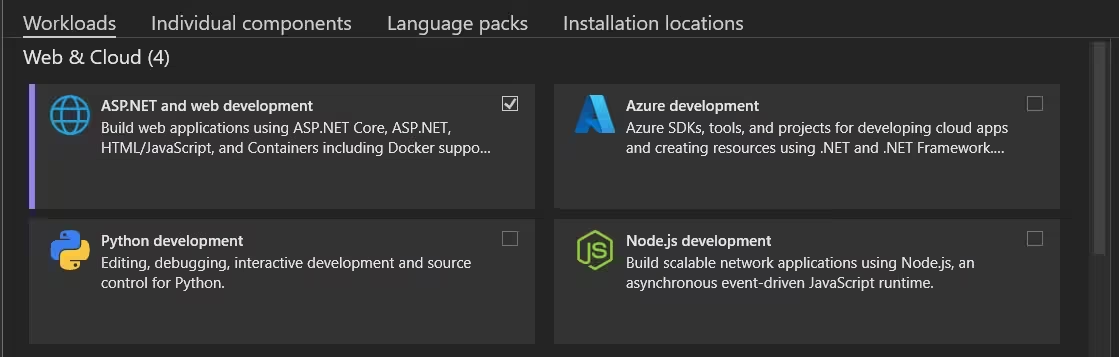
Step 3 – Select necessary applications from Workloads
Workloads should be selected by default.
In Workloads, there are 4 options – Web & Cloud, Desktop & Mobile, Gaming and Other Toolsets
In Web & Cloud, select ASP.NET and web development. ASP.NET is essential for creating websites with C# language.
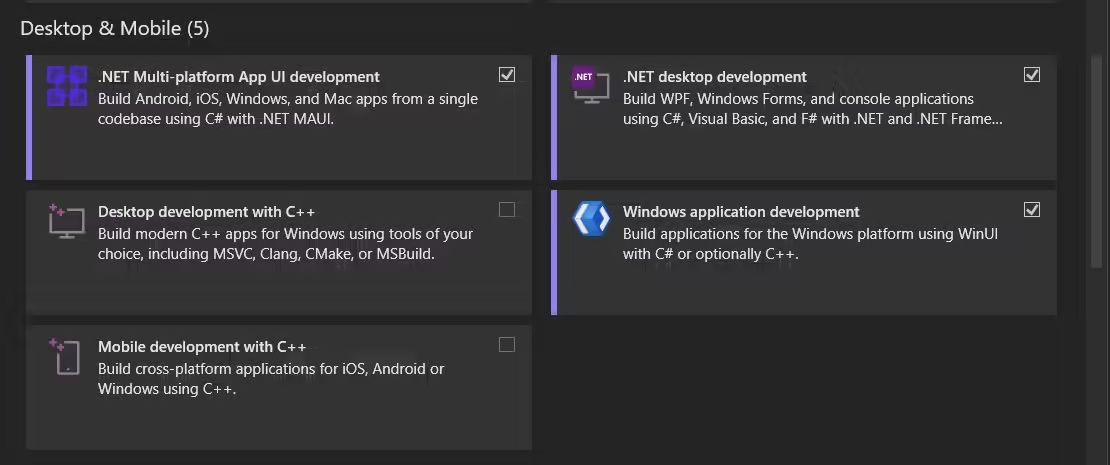
Now scroll down to Desktop & Mobile section and select .NET multi-platform App UI development, .NET desktop development and Windows application development. With these platforms, you’ll be able to develop mobile and desktop applications.
Now scroll down to Games and select Game development with Unity for developing games with c# language.

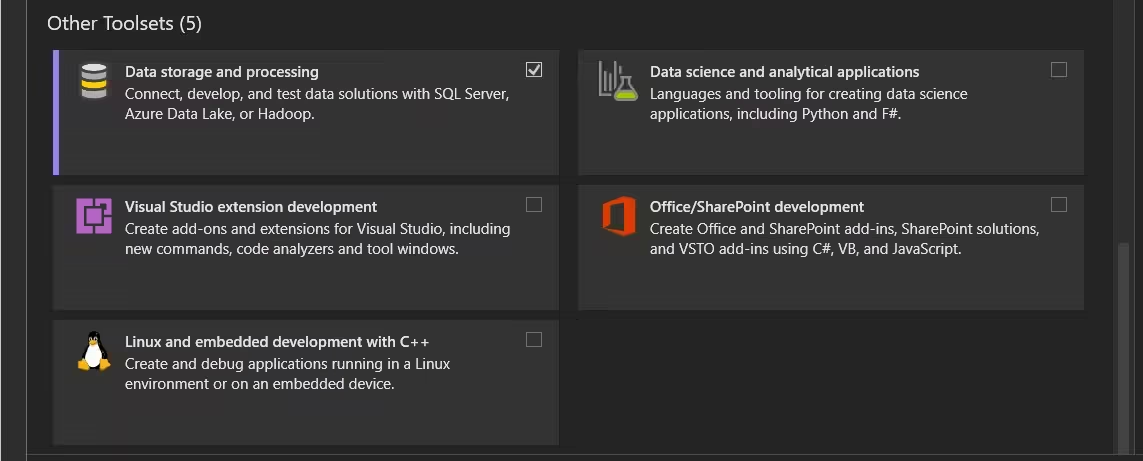
In Other Toolsets, select Data storage and processing. You’ll have to work on databases sooner or later whether you work with mobile application or web development, so it is better to add the addon and reduce future hassle.
Step 4 – Select necessary software versions in individual components
In Visual Studio installer go to individual components to select any specific version of any application for your requirement.
Don’t change anything here if you’re a beginner
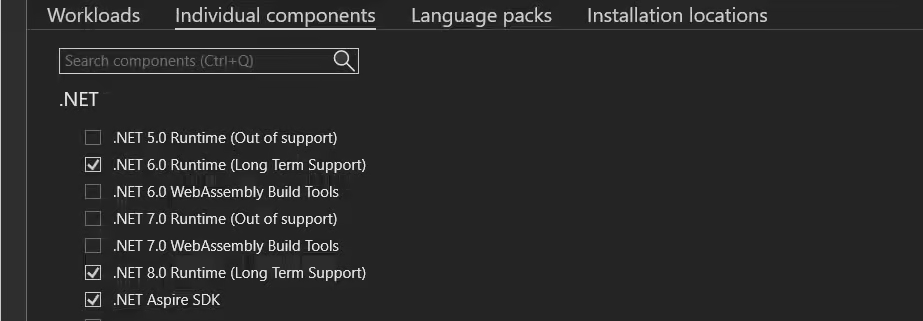
This section is for people who are already working on a project and any specific version is required. Sometimes developers have to work on software running on an old applications. This section is given for those situations.
Step 5 – Change your preferred language in Language packs
If you’re not comfortable with the default language of Visual Studio then you can change your preferential language in Language packs.
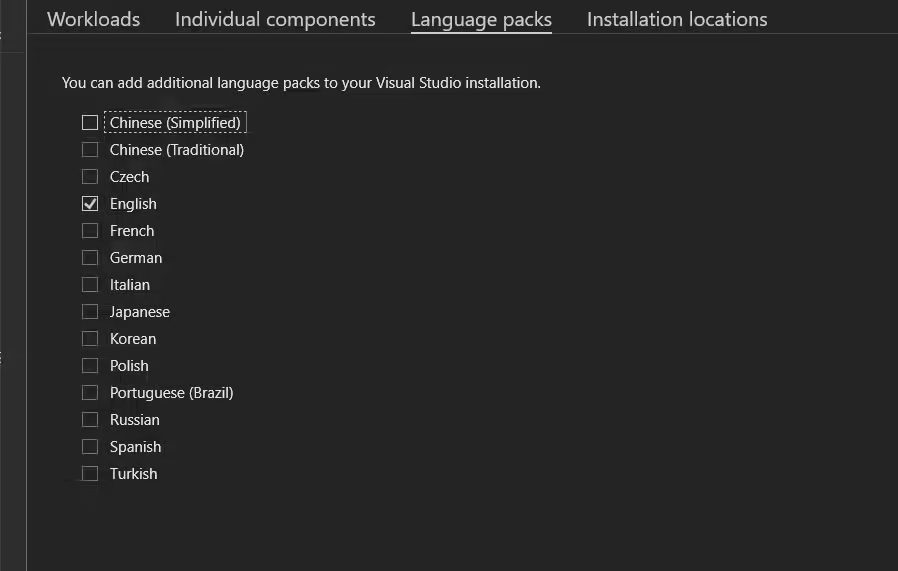
After selecting your preferred language you have to start installing your Visual Studio
Step 6 – Start installing Visual Studio on your Windows
Now go to Installation location to select where you want to install your Visual Studio.
Select your preferred location and start installing.
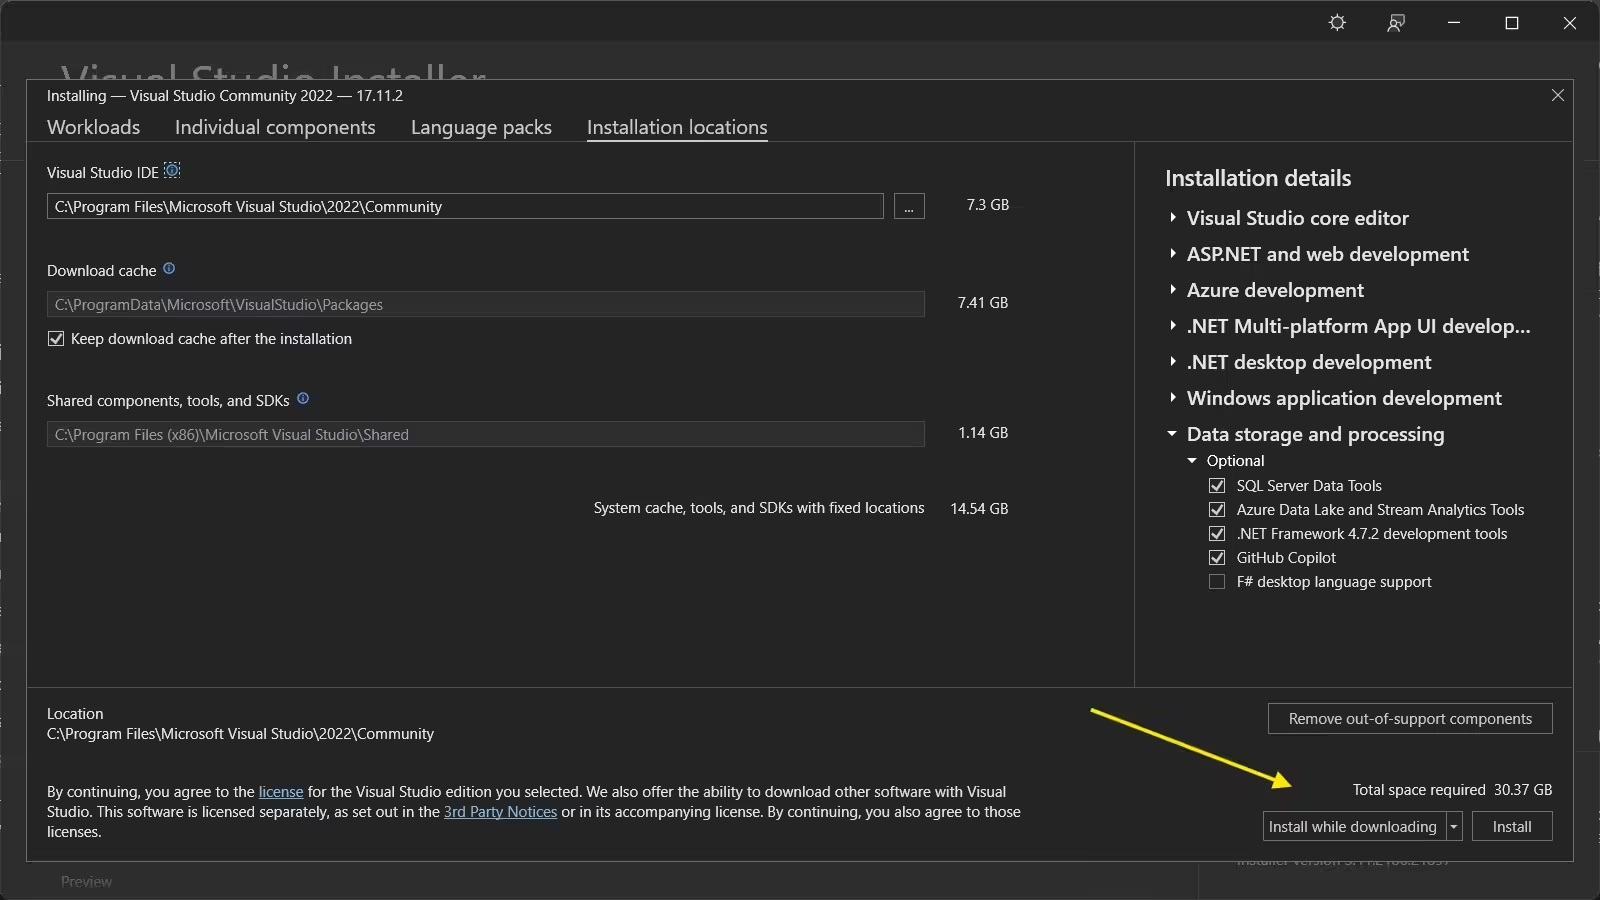
Choose how you want to install your Visual Studio. You can either select Install while downloading or Download all, then Install. If you’re on a slow computer then select the latter one, otherwise simply click Install.
Now, your Visual Studio will start getting installed on your windows.
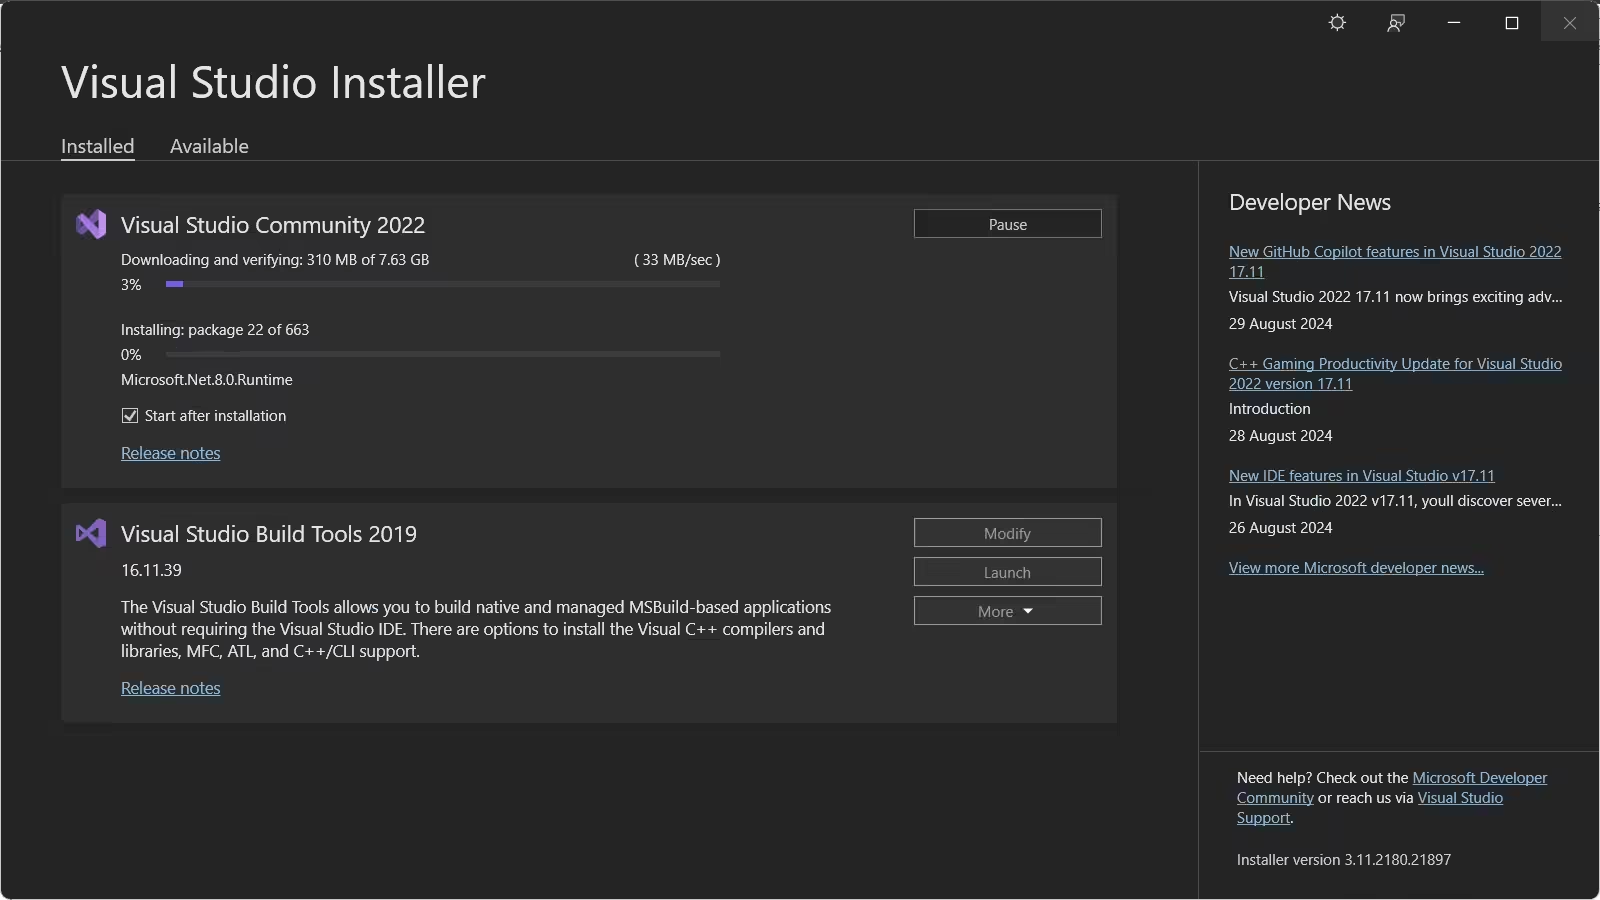
After installation, your Visual Studio will automatically open. If it doesn’t start automatically then you need to restart your computer and launch your Visual Studio.
Step 7 – Create your project and start development
Now installation is finished you just have to start working on your code.
After opening Visual Studio you’ll notice 4 options –
- Clone a repository
- Open a project or solution
- Open a local folder
- Create a new Project
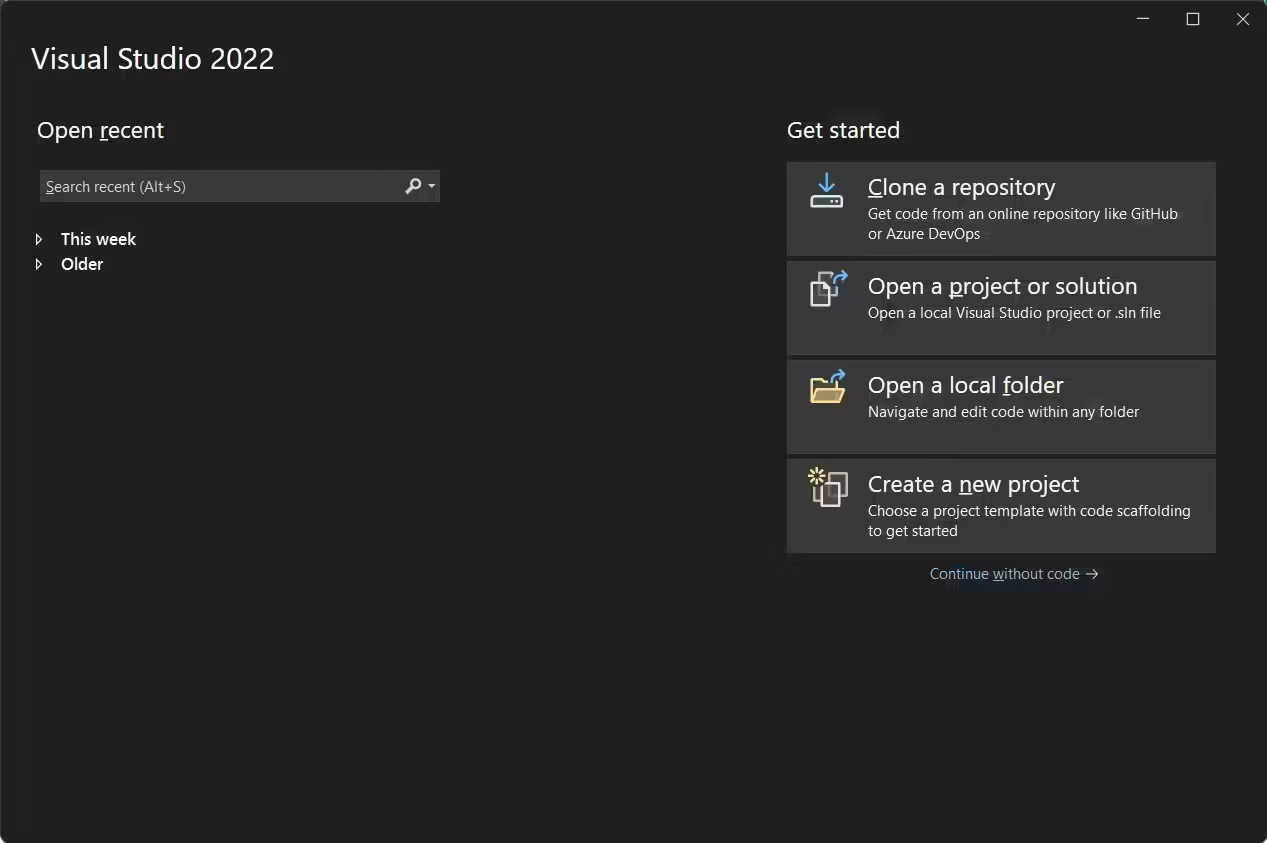
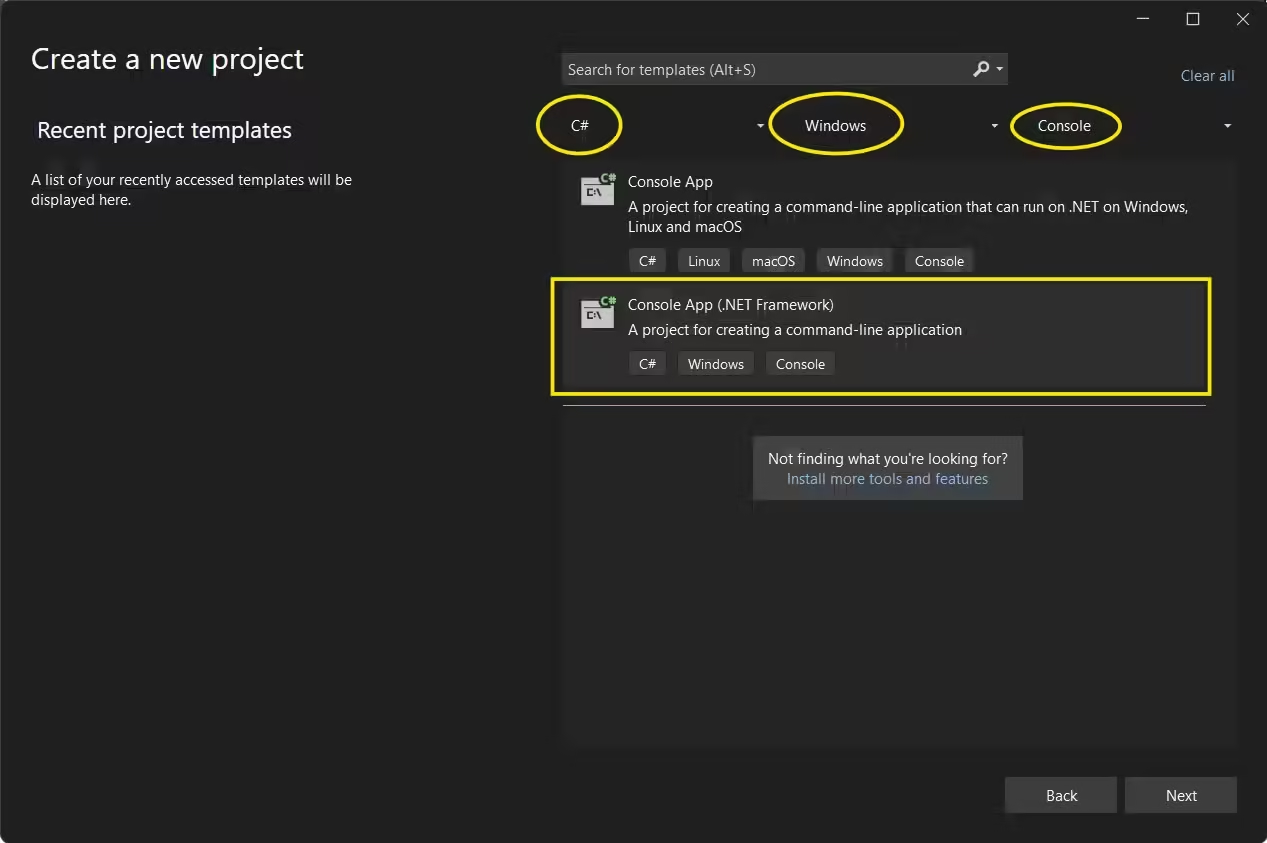
Now you just have to create a new project to start coding. To create a new project select the 4th option then select necessary template to proceed.
For learning C#, starting with a Windows project is ideal. To create a Windows project you need to select 3 filters from the dropdown.
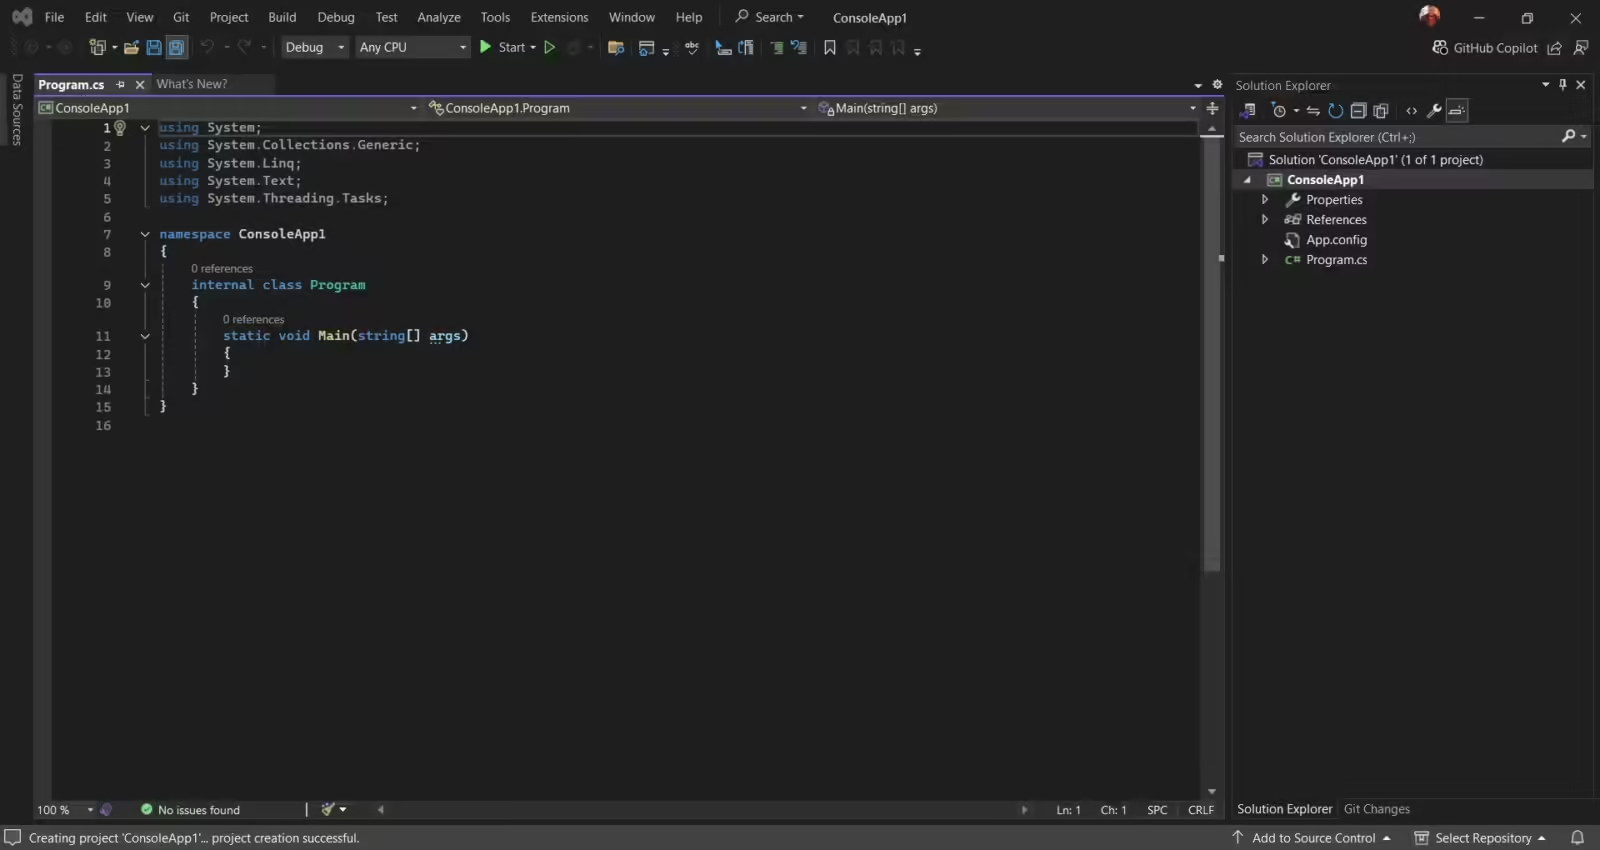
Now you have to put your project name and solution name to open your programming interface.
The project name is for the file you’ll work on and the Solution name is for the folder you’ll use to save everything.

If you’re able to open this page, it means your Visual Studio is working perfectly. Depending on version and settings you may see something different but the interface will look like this.
That’s all you need to do to install Visual Studio Community on your Windows and start your first project.
Having trouble with Visual Studio?
There are many ways you can solve your issue. The best to solve your issue would be to post your issue on StackOverflow. You’ll get a solution within 12 hours. There are over 23 million users so you’ll definitely get a solution.
You can contact Microsoft. And you can also look at trouble shooing guide from Microsoft.
Conclusion
Installing Visual Studio is very easy. You just have to know what applications you want to use from the Microsoft ecosystem and you’ll be able to integrate it easily with just a few clicks. It is similar to installing a game on your Windows with a few additional functions.
Moreover, adding applications and integrating them is very easy you just have to use the installer to install the application you need and you’ll be able to start working on your project.
You’ll definitely love this IDE.
Get up to 85% off
Build your project using Managed VPS & Dedicated hosting and decrease your workload.
You'll get seamless migration, exceptional savings, 24/7 technical support, HIPAA compliant, PCI compliant, Multi-Level DDoS protection, 30-day money-back guarantee and more with Liquid Web.
Affiliate Disclosure: Affiliate links are available here. If you click through the affiliate links and buy something, we may get a small commission, and you'll not be charged extra.