Setting up VS Code for JavaScript Development Environment
Welcome to the 1st post of the JavaScript Tutorial Series. Here we’ll set up a JavaScript development environment for JavaScript Beginners. We’ll show you the step-by-step process of setting up a JavaScript code editor and writing your first code to make sure everything is working perfectly.
No need to worry it is an easy process and we’ll guide you through every step of the way. But before we start, let’s get into what you need to have on your PC to learn JavaScript.
What do you need to get started?
The only thing you need to install on your PC is a JavaScript code editor or an IDE.
We’ll also need a modern web browser with a built-in developer tool. But don’t worry, every computer and laptop comes with a modern web browser and you don’t need to install it.
Buy why we need a code editor and web browser? Let’s get into the brief detail.
JavaScript Code Editors & IDEs
To learn programming, you need a place to write your codes. Code Editors and IDEs are the platforms where developers write their JavaScript code.
A code editor is a type of software where you write your code and edit it with advanced developer tools. There are many kinds of code editors. Some very extremely lightweight and only come with a basic text editor and some come with built-in advanced features like syntax highlighting, autocompletion, debugger, advanced extensions, etc. Most developers prefer to use code editors with advanced features.
Some of the most prominent JavaScript Code Editors are VS Code and Sublime Text.
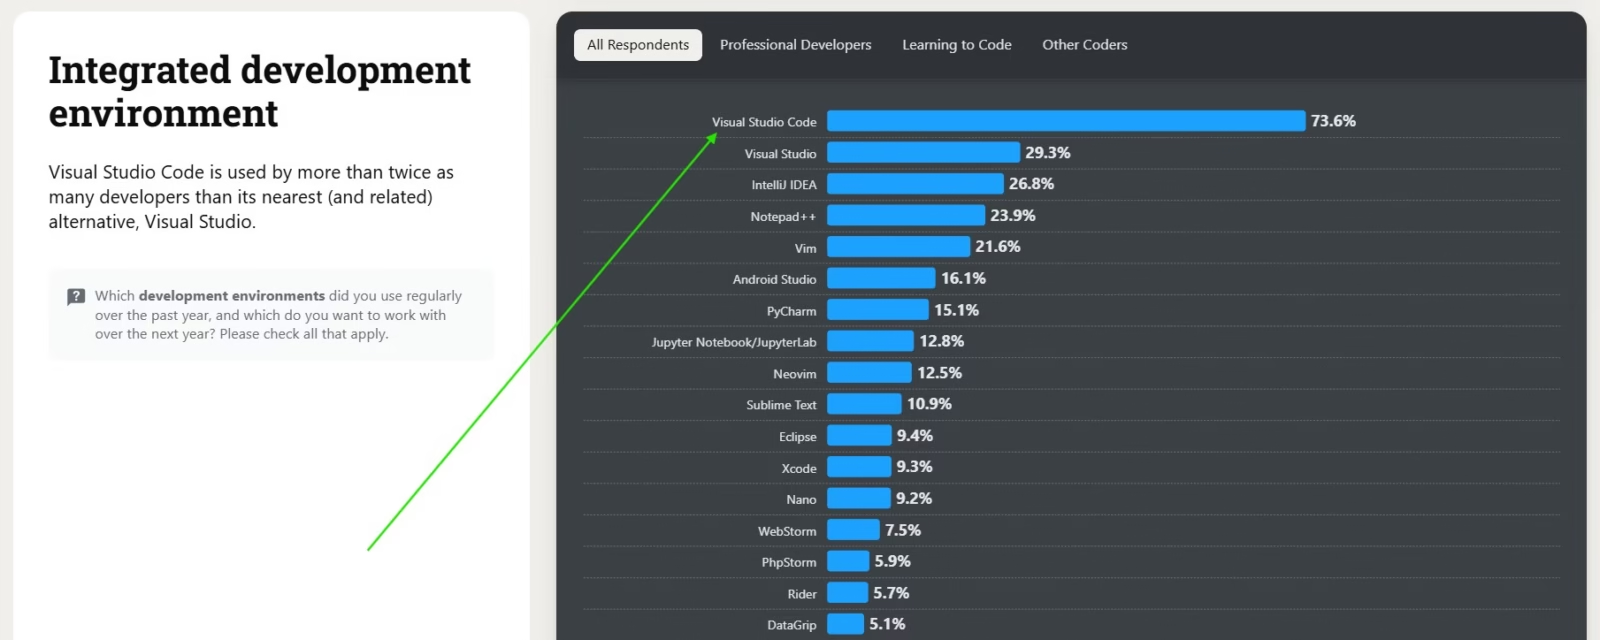
Note: VS Code is used by 70% of developers according to the StackOverflow Developer Survey. It is famous for its speed and flexibility. We recommend you to use it.
Now let’s get into what is an IDE. An IDE is an advanced code editor that comes with full-featured advanced capabilities to build any kind of large-scale project and developers can work with their team members seamlessly.
The most famous JavaScript IDE is WebStrom. It has a free community edition. If you want to use everything the WebStrom IDE has to offer, then you have to purchase the premium edition. If your fellow developers are in the WebStrom ecosystem, then go for it, otherwise VS Code is a better option for learning JavaScript.
Web Browser
JavaScript primarily runs in web browsers. So we’ll use a web browser to run JavsScript.
All popular web browsers i.e. Chrome, Firefox, Safari, and Edge all have JavaScript engines that can understand and run JavaScript code. So any of these web browsers will work. Primarily we need to use the developer’s tool in our web browser to investigate what is going on under the hood.
We can even do coding in the web browser’s developer’s console. You can right-click and go to inspect to open the developer tool and go to the console tab to code inside your browser.
So to summarize why we need a web browser –
- You can check how your JavaScript code changes a webpage in real-time.
- You can debug your code to find and fix errors.
Now that you know about code editors and web browsers, let’s get into installing a code editor to get started with JavaScript.
Install a suitable Code Editor (VS Code)
For this JavaScript tutorial, we recommend Visual Studio Code (VS Code).
Visual Studio Code (VS Code) is a free, lightweight, open-source code editor. It comes with built-in advanced features like IntelliSense, debugger, code navigator, etc. VS Code comes with out-of-the-box features for JavaScript development.
VS Code is lightweight and fast, compared to most code editors and IDEs. If you want to use some additional features then you just have to install an extension and you’re good to go.
It is the most popular code editor. In 2024, over 70% of the developers used VS Code for learning and professional work according to StackOverflow developer survey 2024.
VS Code runs on all major Operating Systems and it works out of the box for most of the JavaScript development tasks. You don’t have to be worried about complex setup process.
Now, let’s get started with installing VS Code
Installing VS Code
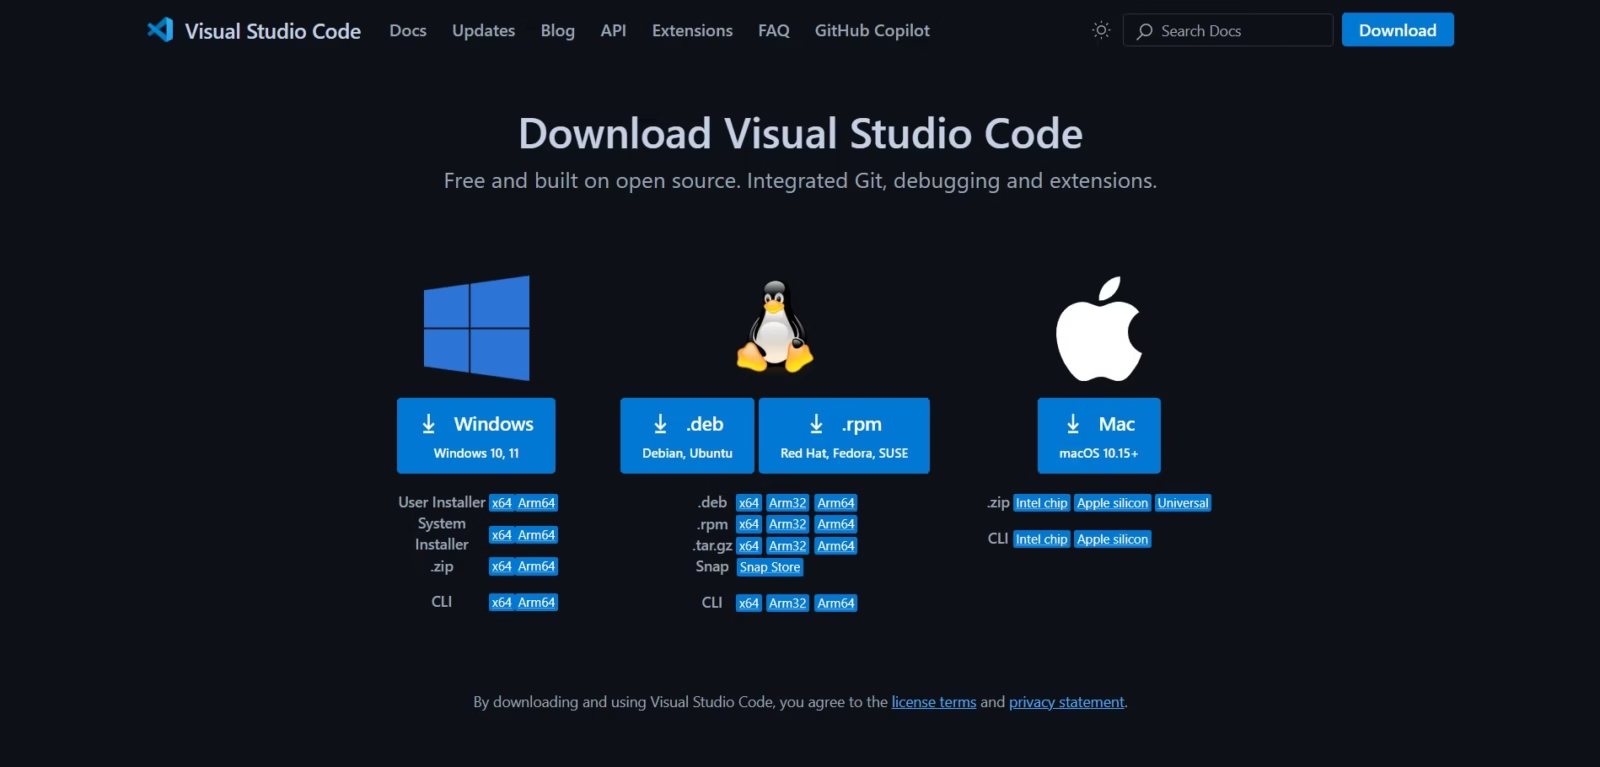
Go to the official VS Code Download Page and download it according to your Operating System. And run the downloaded file.
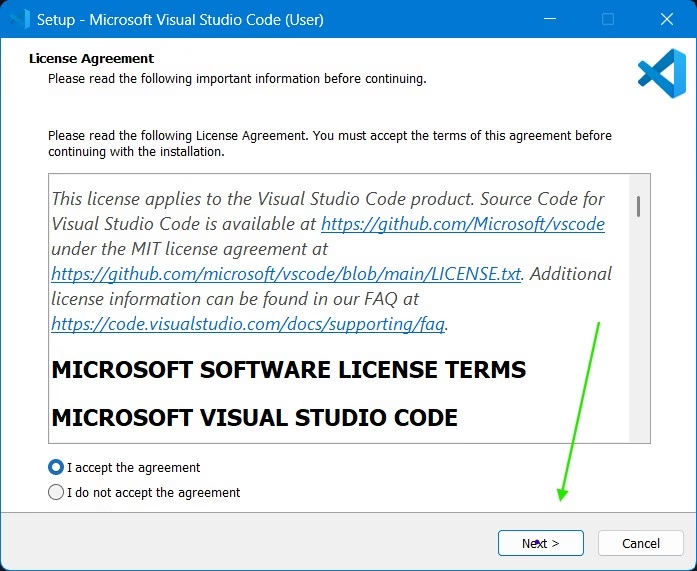
After opening the installation file, a new window will open to install vs code. Here you have to read and agree to the Licence agreement and proceed to the next step.
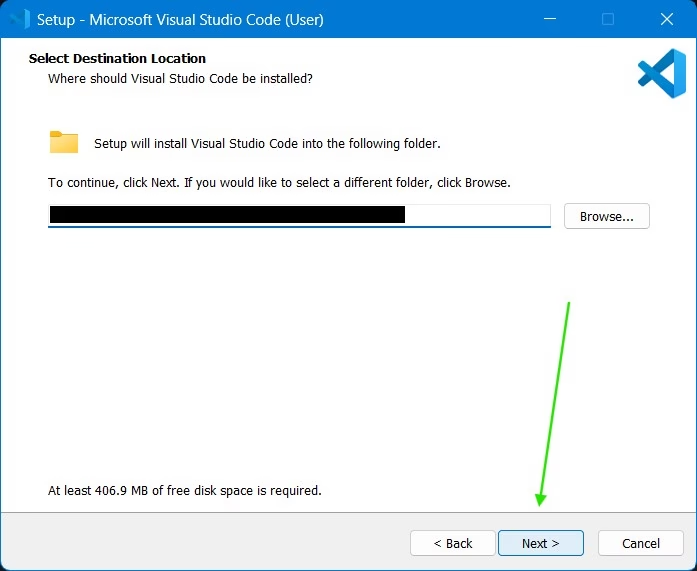
Select the destination location to install VS Code. Simply click next and VS Code will be installed in the default location.
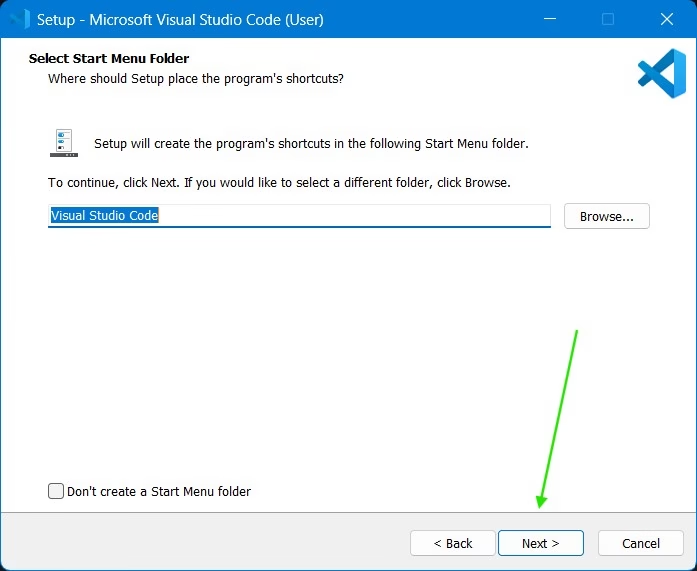
You can change the VS Code default folder name if you want. Simply click next, most people don’t need to change the folder name.
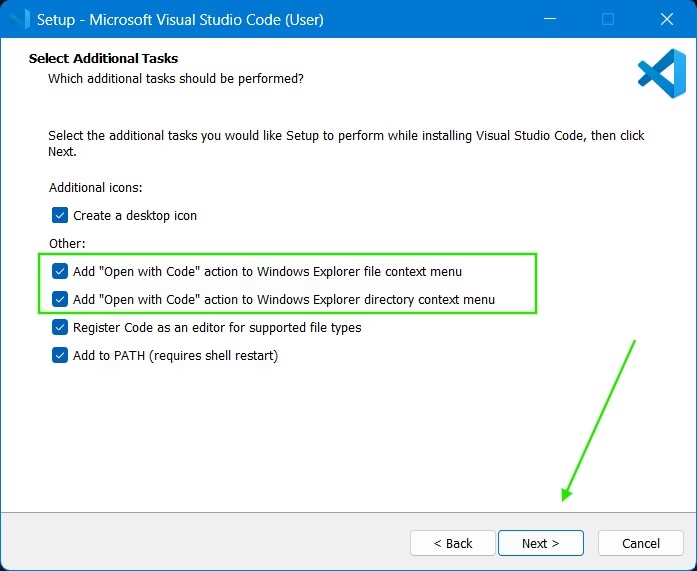
Select your additional Tasks here. Be sure to check the “Add ‘open with code’ action…”. This will add “Open with Code” option when you right-click on your PC.
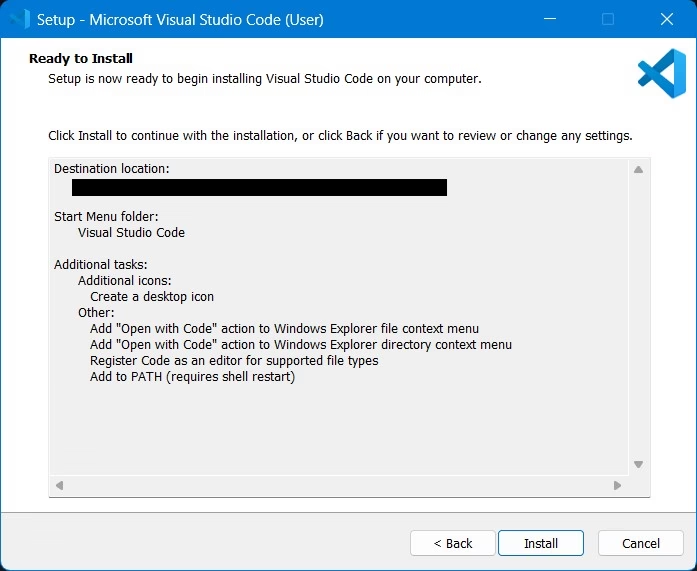
Review your installation selection here and proceed to the next step.
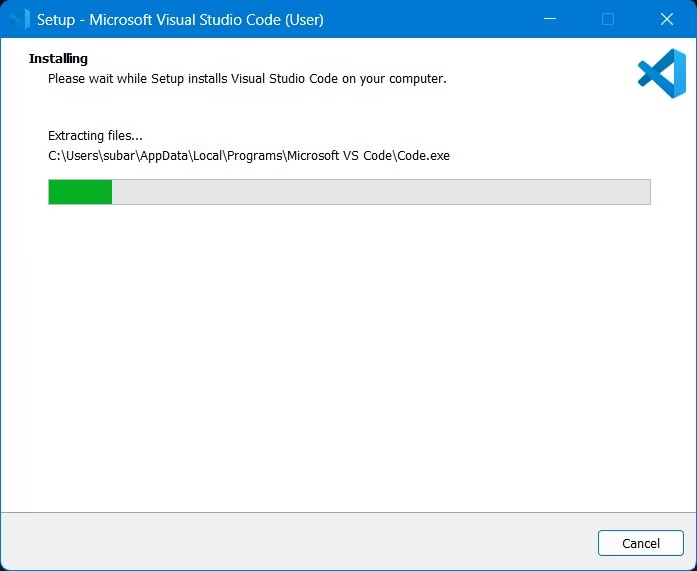
Installation will begin here. Just wait a few minutes to finish the installation.
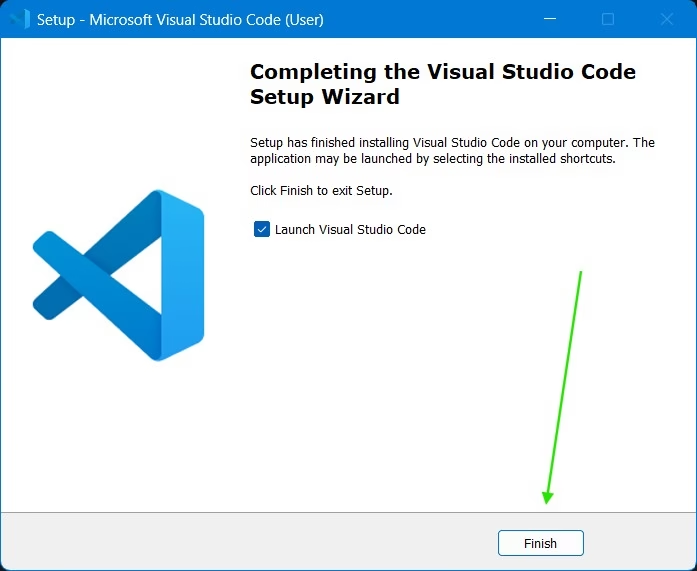
Now your VS Code should be installed on your PC. Click on launch from this option and proceed.
If you’re new to VS Code, don’t make any manual changes at the beginning. It may create issues later. Click on Mark Done and proceed.
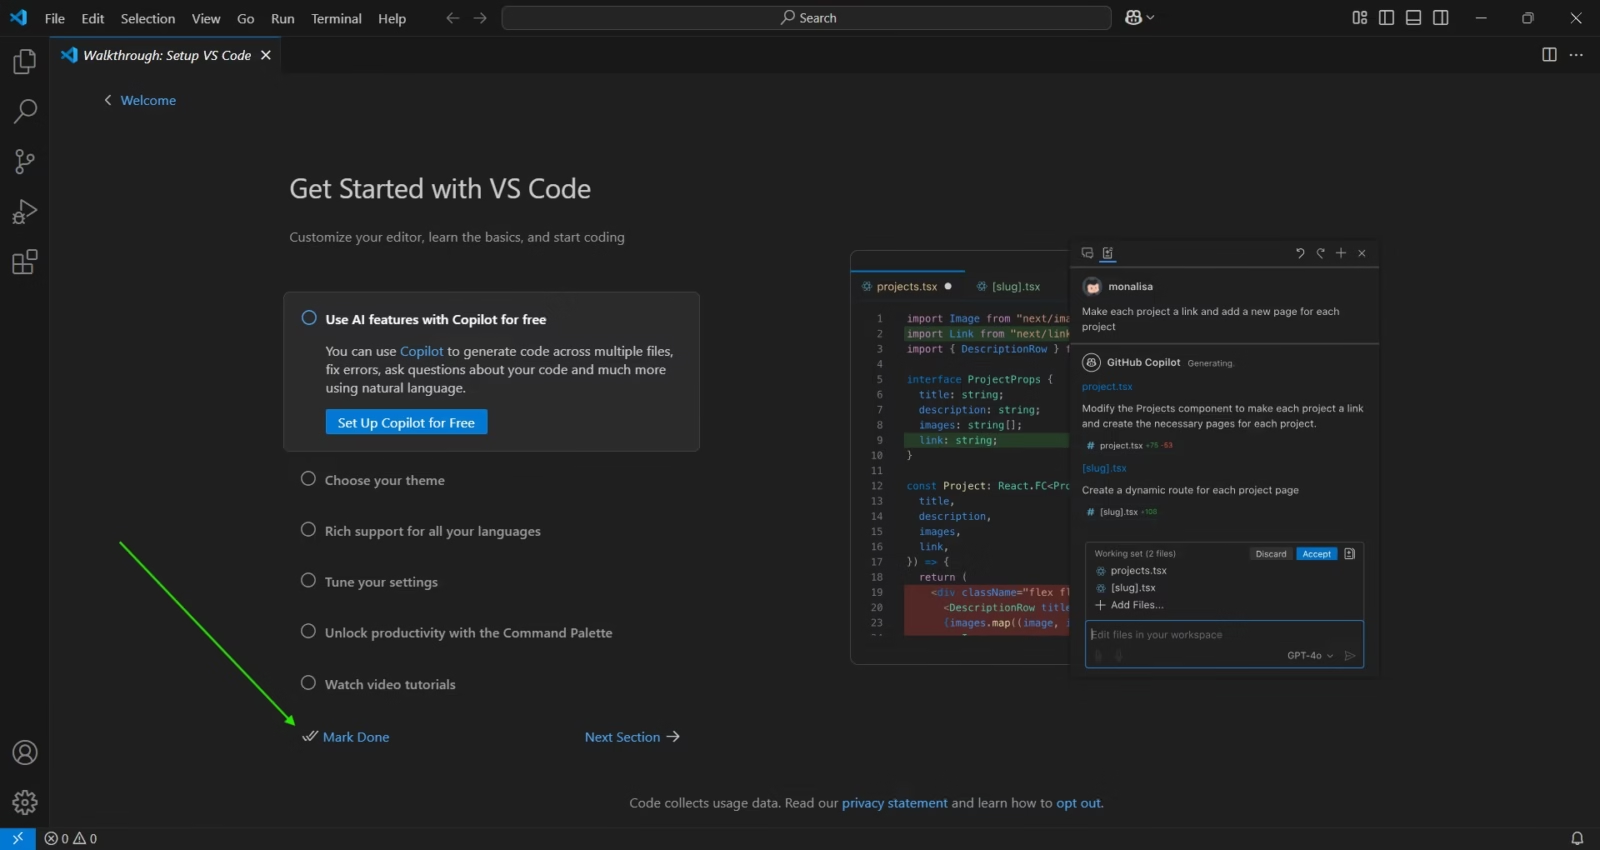
After you click on “Mark Done”. A welcome window will open will open. Stay there and we’ll continue with the next step.
VS Code Setup for beginners
We’re going to change a couple of VS Code settings and install a few extensions. These settings and extensions will help you perform your task efficiently. After you get familiar with VS Code, you can change your settings and more extensions depending on your needs.
Enable Auto Save in VS Code
Auto save in VS Code is important. When you’re working on VS Code, you need to save your file after making changes. You can click the CTRL + S shortcut to save directly every time you make changes in your file, or you can enable auto save and let VS Code save your file whenever you change your tab or minimize your window.
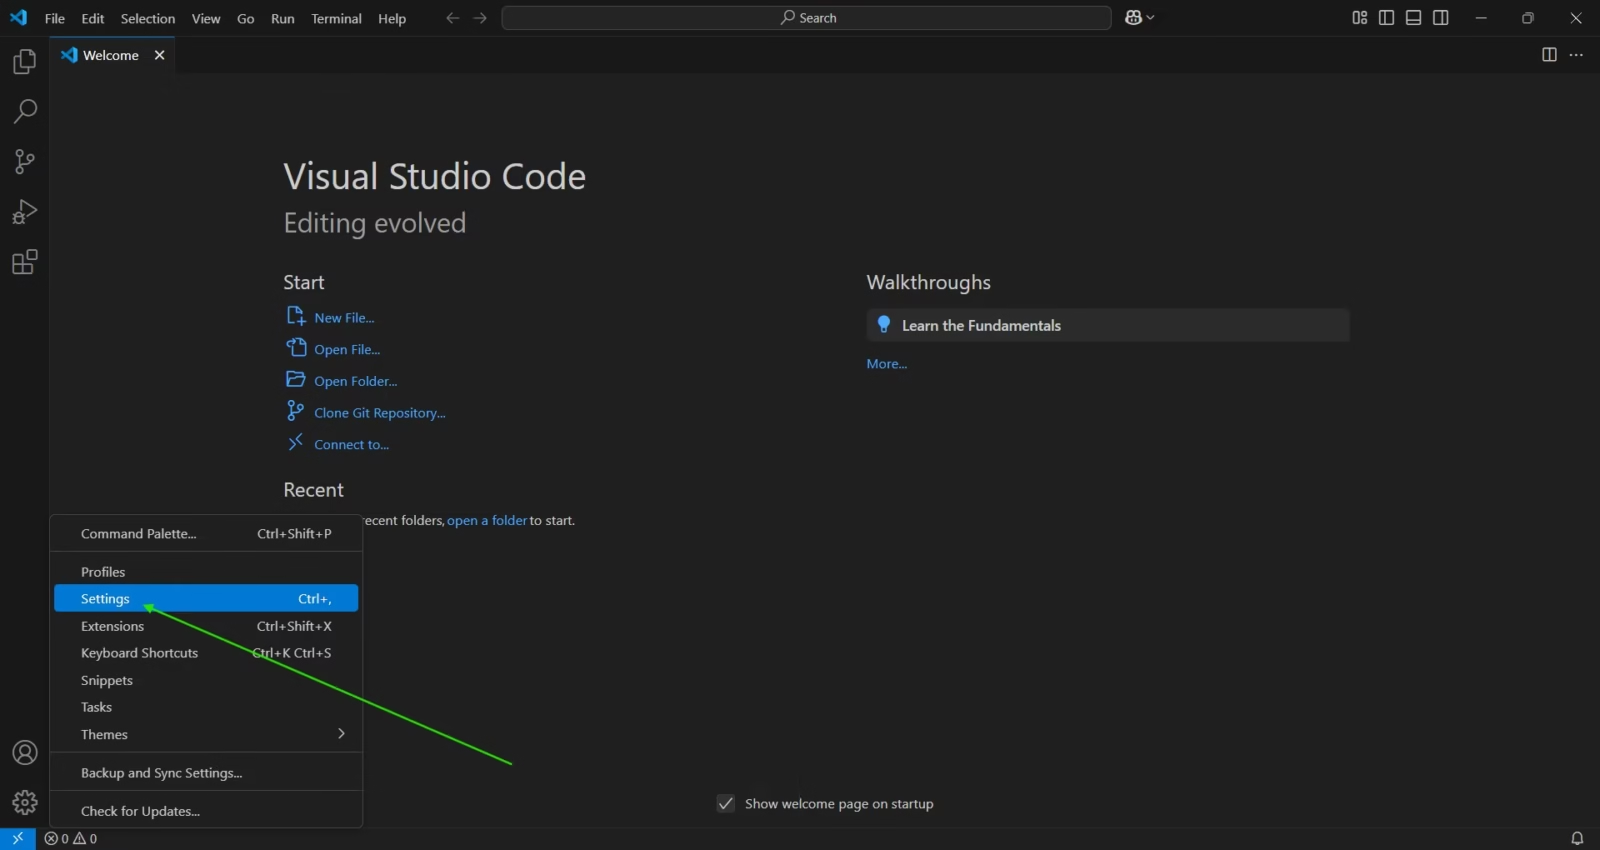
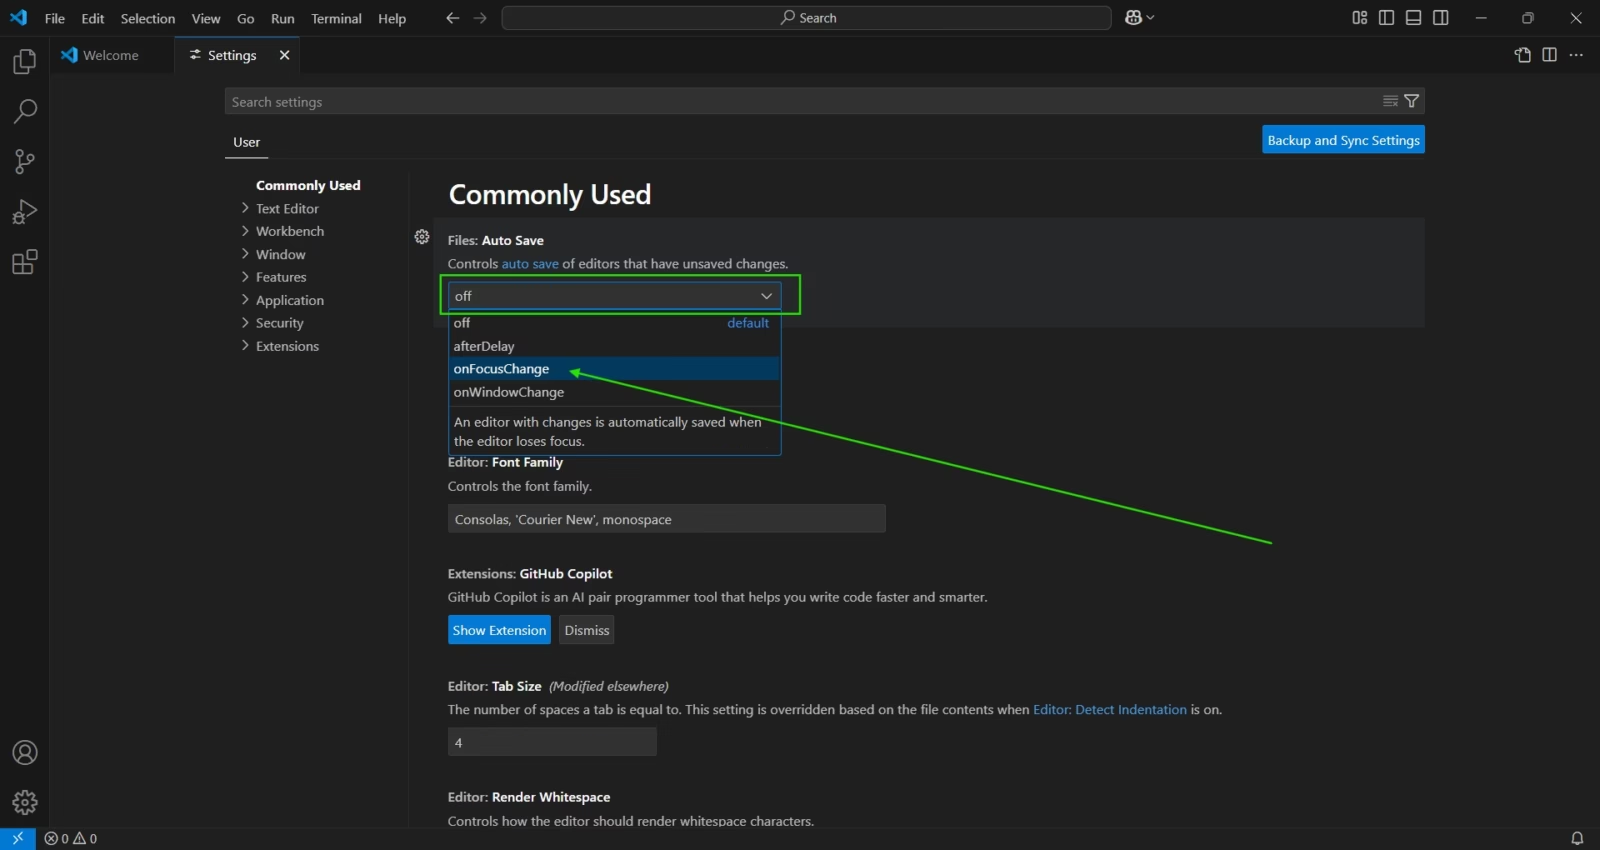
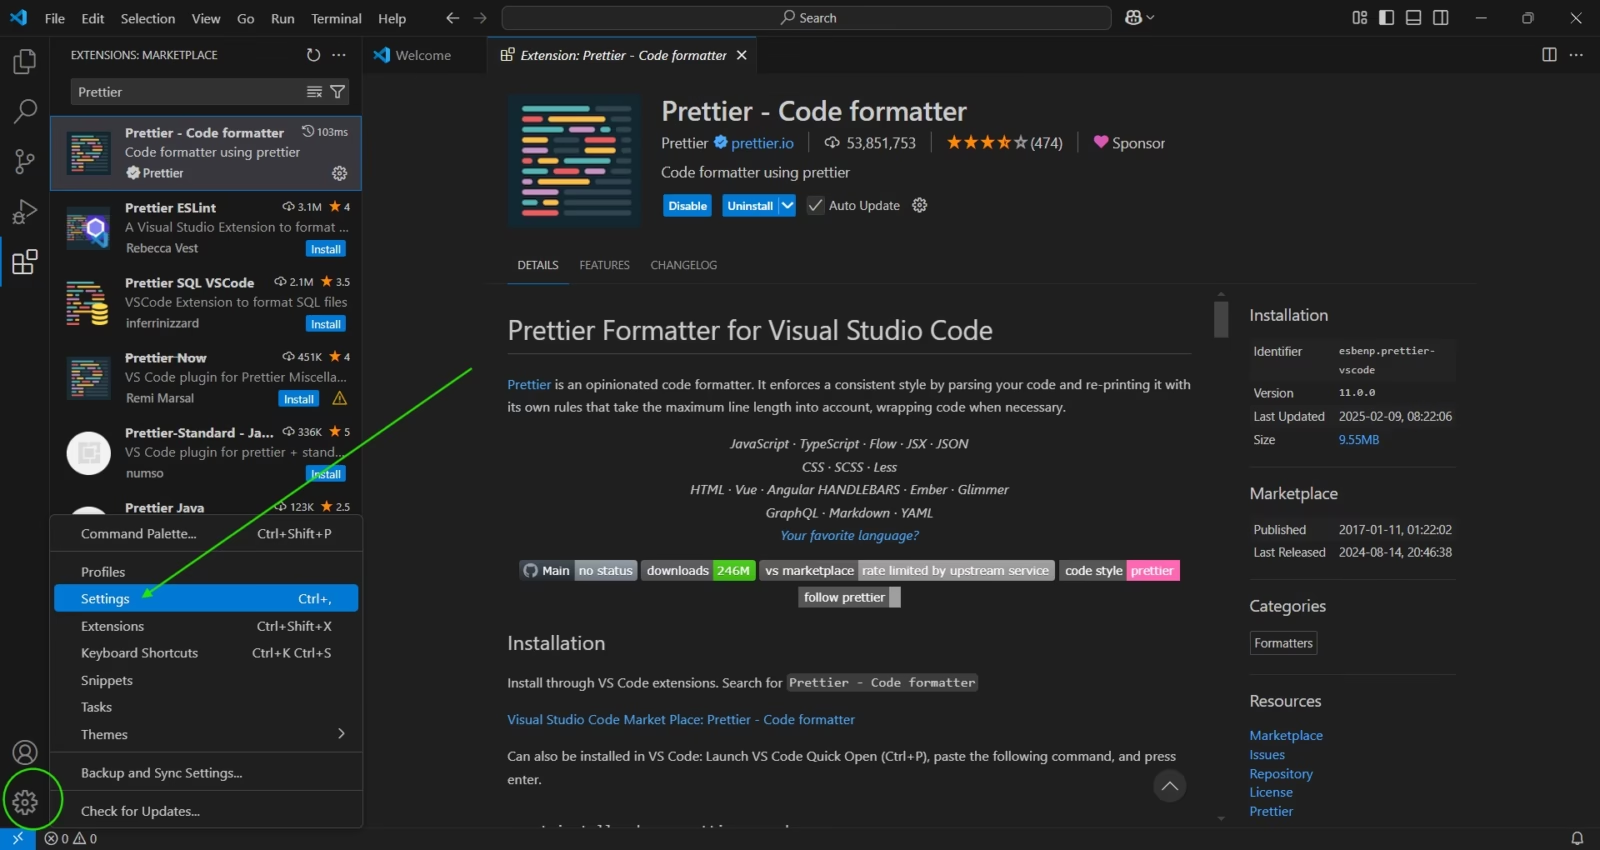
To enable Auto save, click on the “settings wheel icon” on the bottom left and go to settings options.
After opening the settings tab, You’ll see the “Auto save” option at the top, select “onFocusChange” from the drop-down. With this enabled, VS Code will automatically save your code whenever you change your tab while working or change your window.
If you’re unable to find “Auto Save” click on the search bar inside the settings tab and search “Auto save”.
Now “Auto Save” should be enabled and we’ll proceed to the install Prettier extension to enable auto format.
Install Prettier Code Formatter & enable auto-format
Prettier is one of the most famous Code Formatter in VS Code. It formats your messy JavaScript code to make it more readable and manageable.
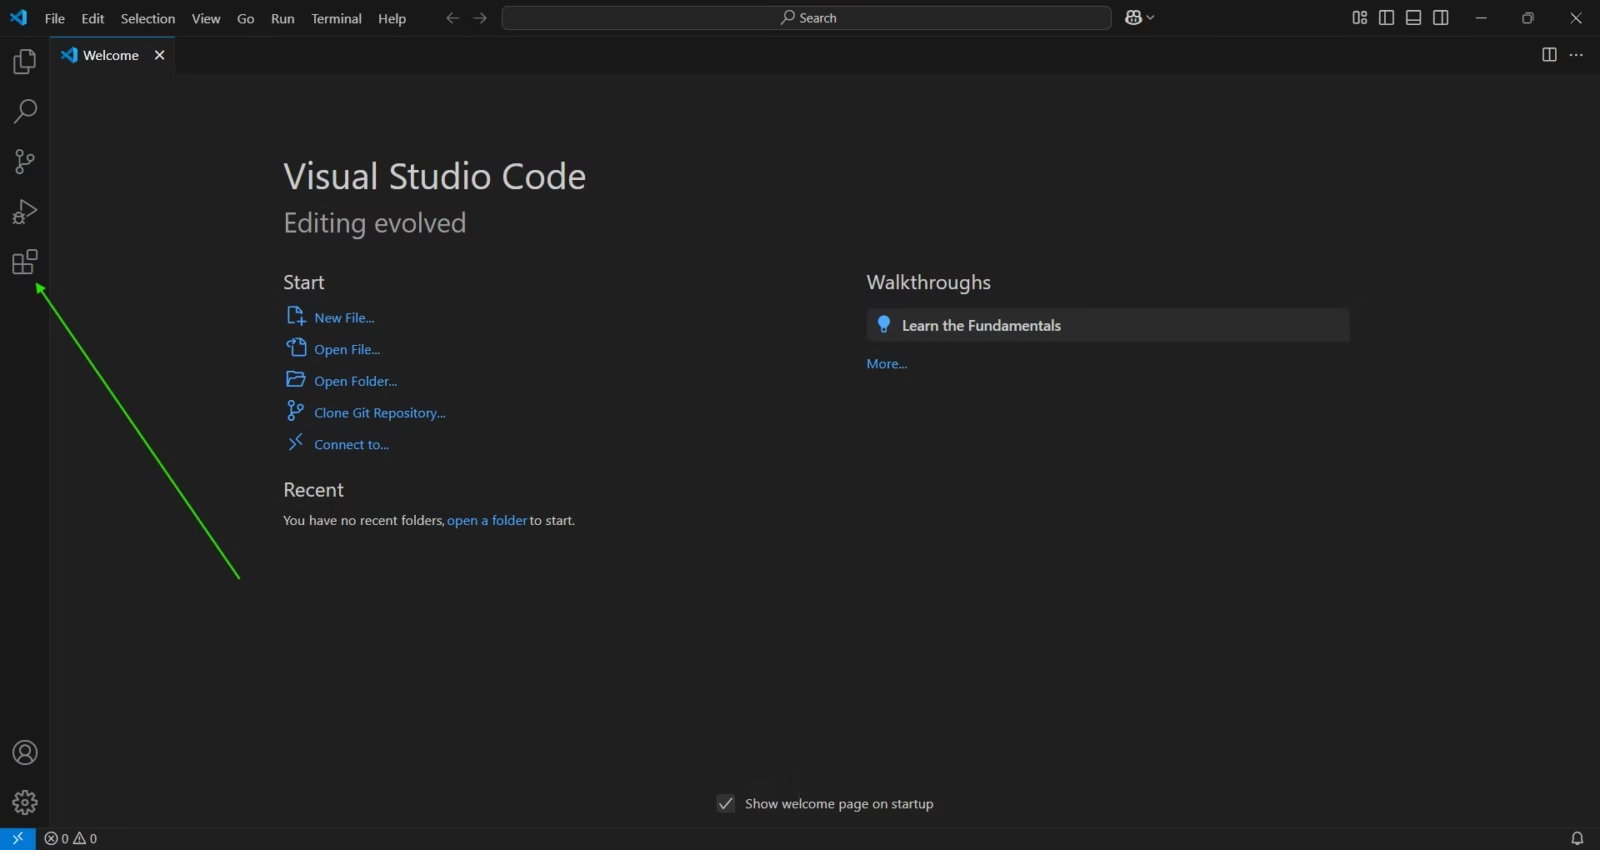
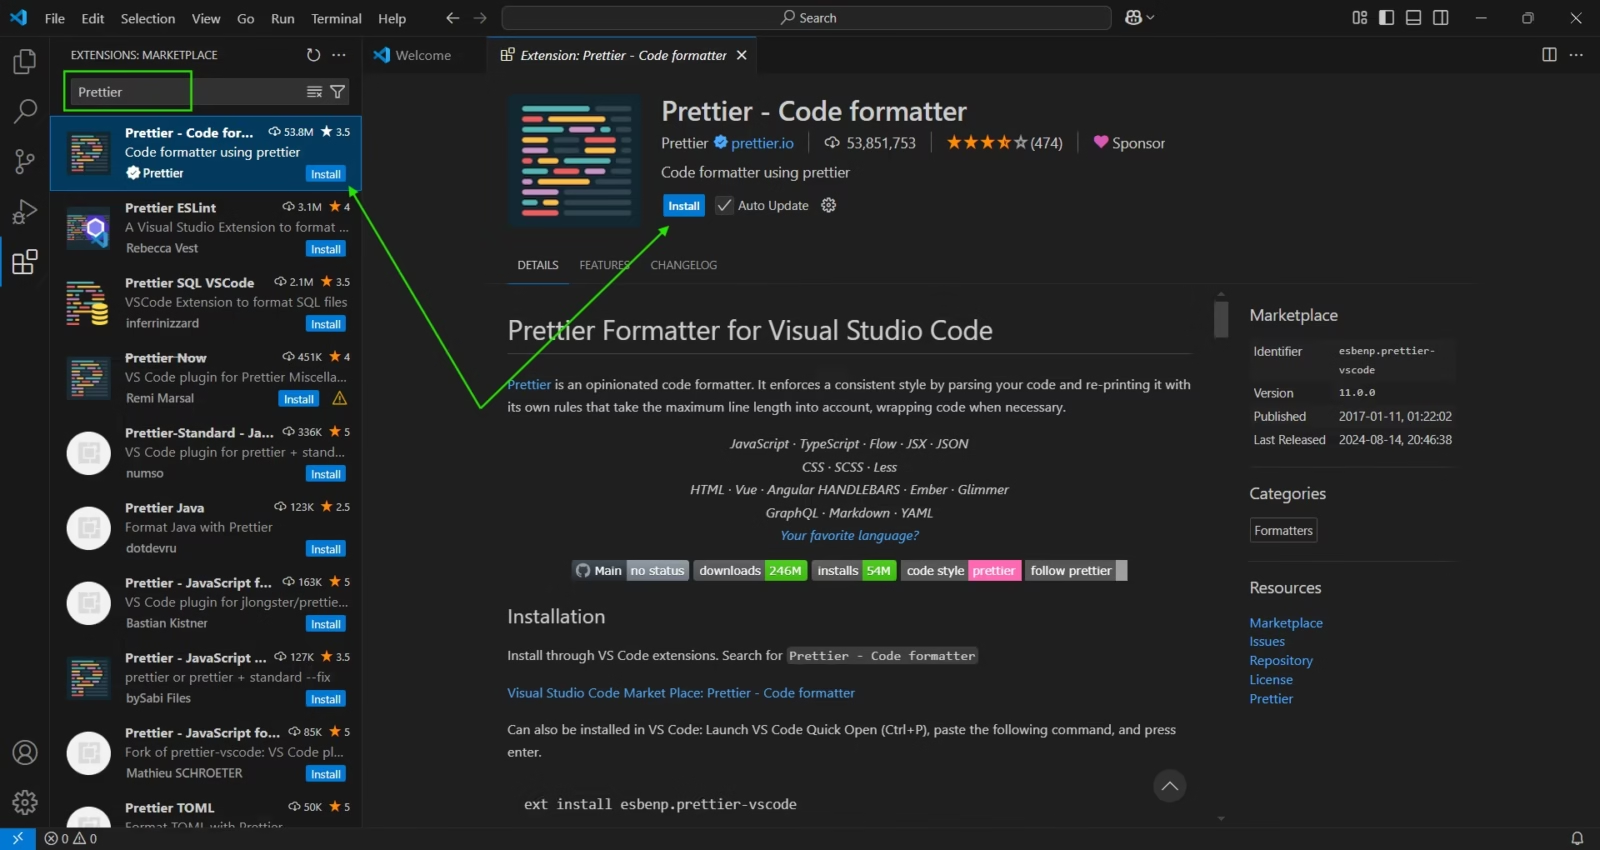
To install the Prettier Code Formatter in VS Code, go to extensions from the left side panel.
Then Search “Prettier” in the extension search bar and click on the Prettier extension with the Blue Tick. Then click on Install.
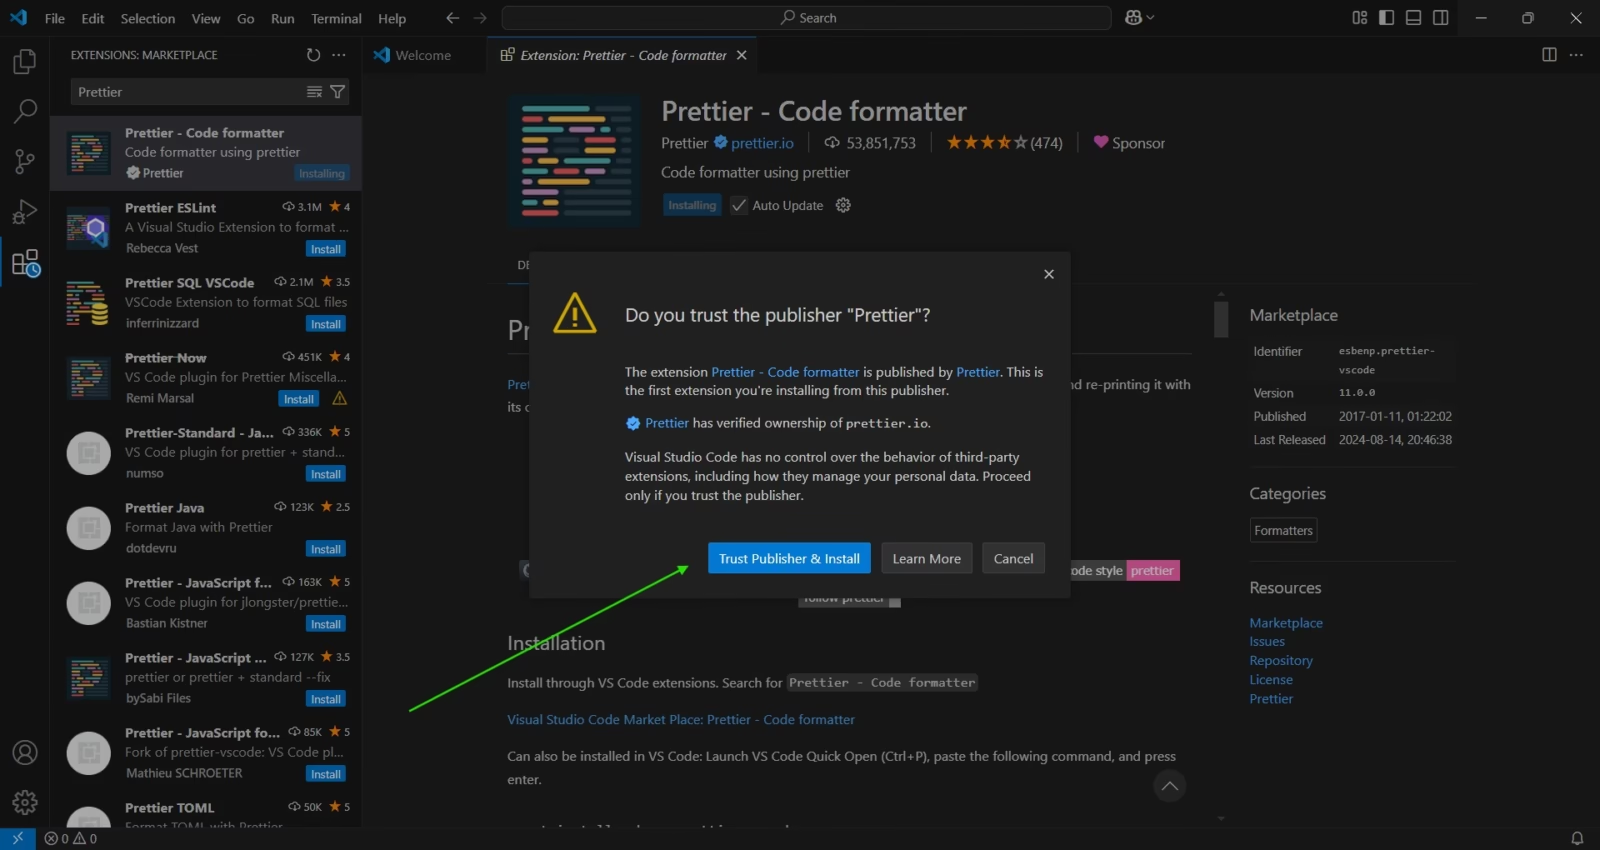
You may get a pop-up in VS Code when you try to install an extension, click on “Trust Publisher & Install”. This happens when you install an extension from a publisher from which you have never installed an extension before.
Prettier Code Formatter should be installed in your VS Code. Now we’ll change the settings again.
Now go to settings just like how we did before. Click on the Settings Wheel Icon on the bottom left and click on Settings.
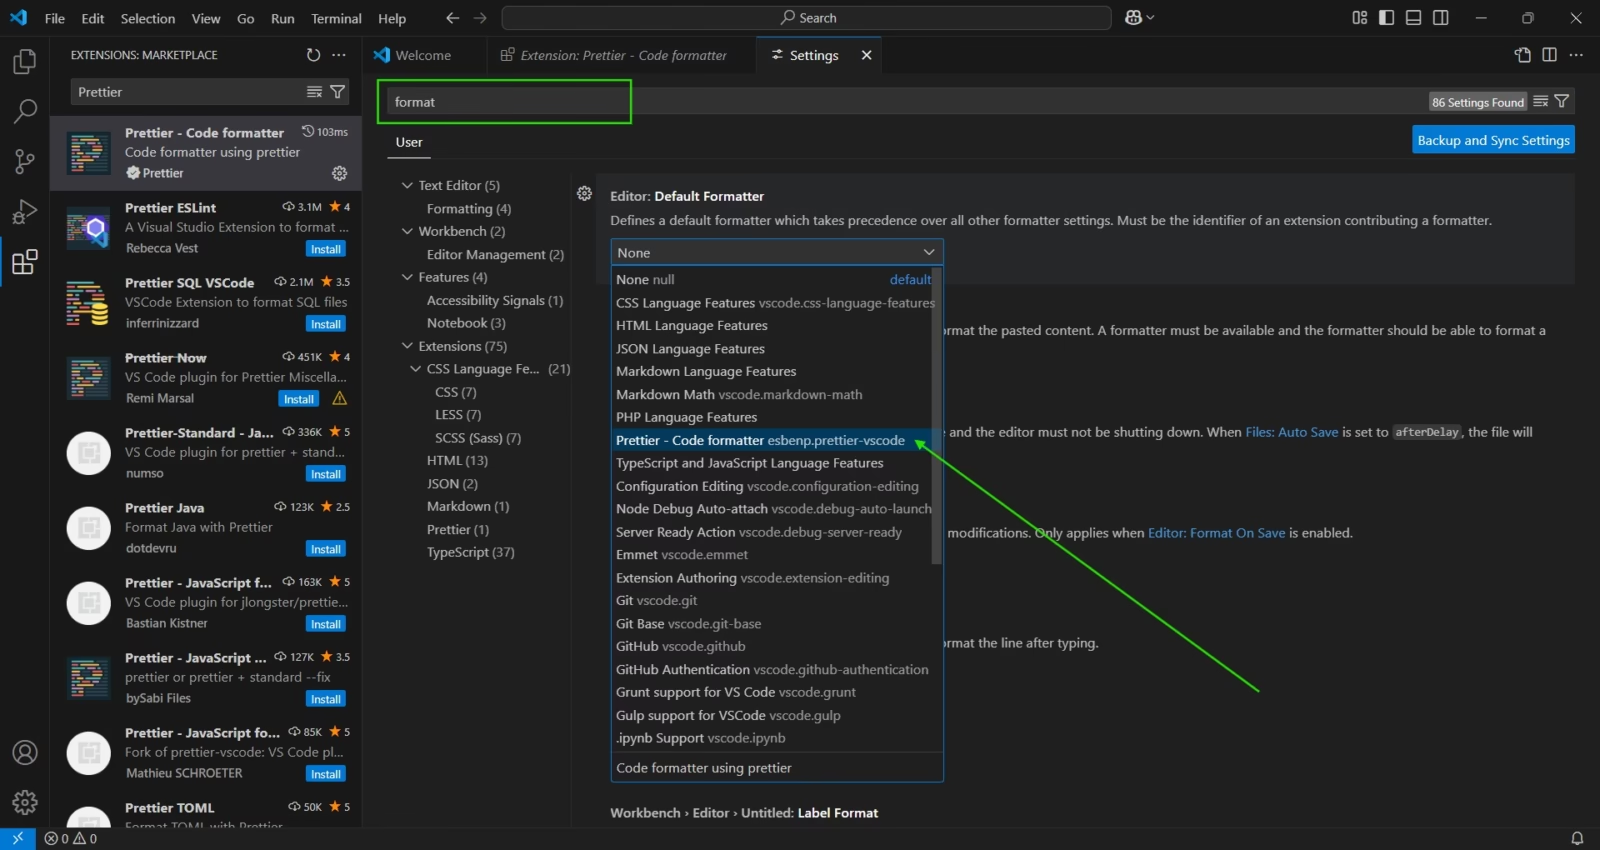
Now Settings Tab will open in VS Code. Inside the Settings tab you’ll notice a search bar, there you have to search “format” to find formatter settings. When you find “Default Formatter”, select “Prettier – Code Formatter” from the drop-down. It will set Prettier as the default code formatter in VS Code.
After selecting the default code formatter you have to look for the “Format On Save” option below. Mark the check box of the Format On Save option. If you’re unable to find this option simply search the option in the settings search bar and click on the tick box when you find it.
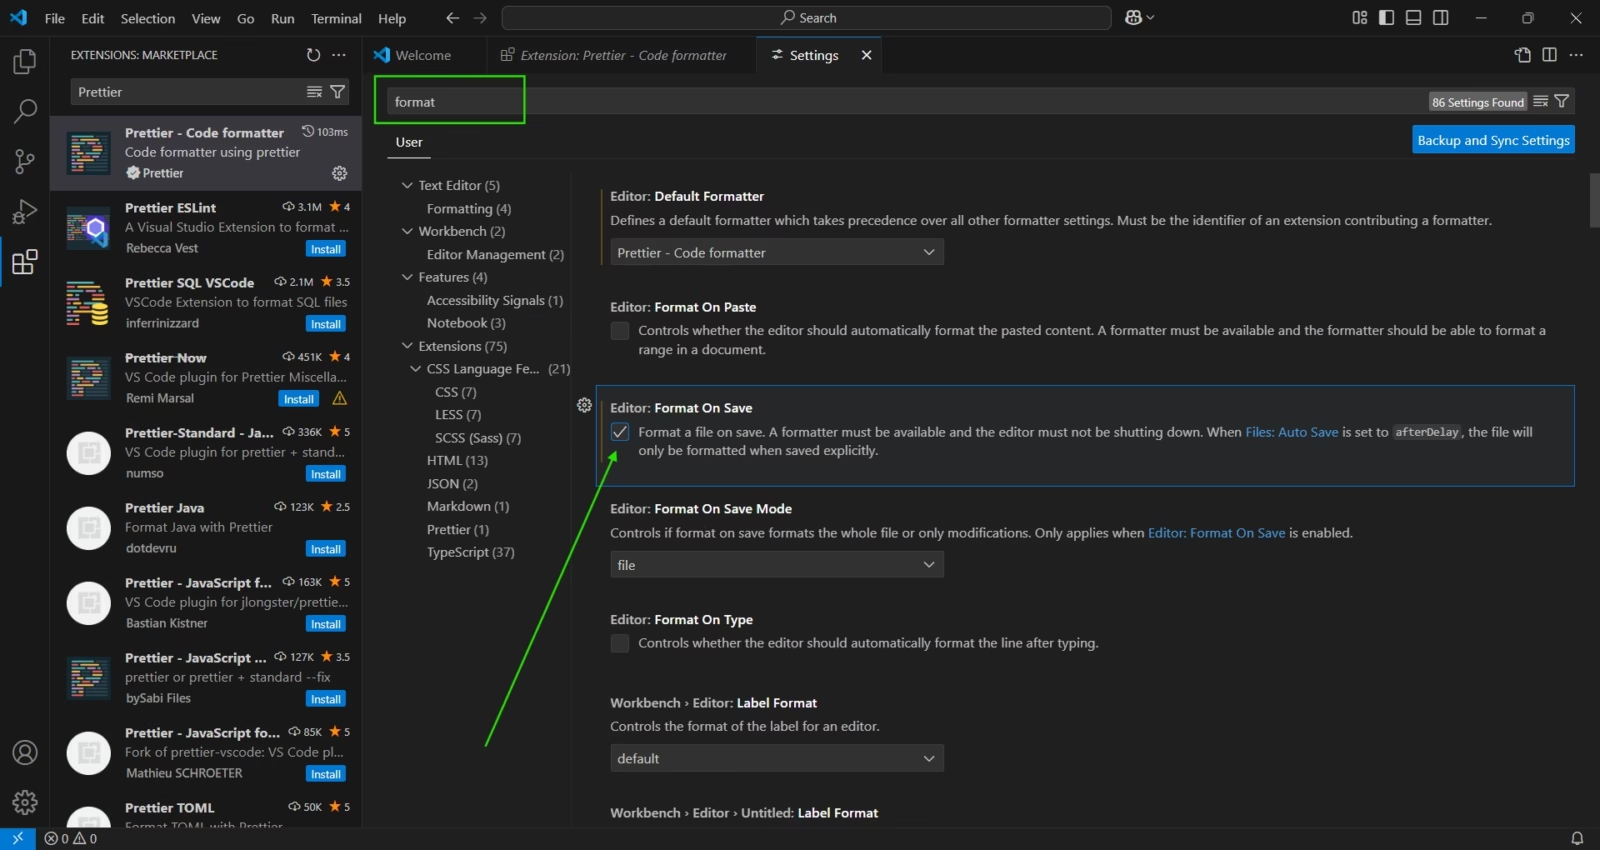
Auto format should be enabled in your VS Code.
Now we’ll check if it’s working or not. To test Prettier Code Formatter we need to create a code with a bad format so that Pritter can make it right. But how do we do that?
Let’s get into it.
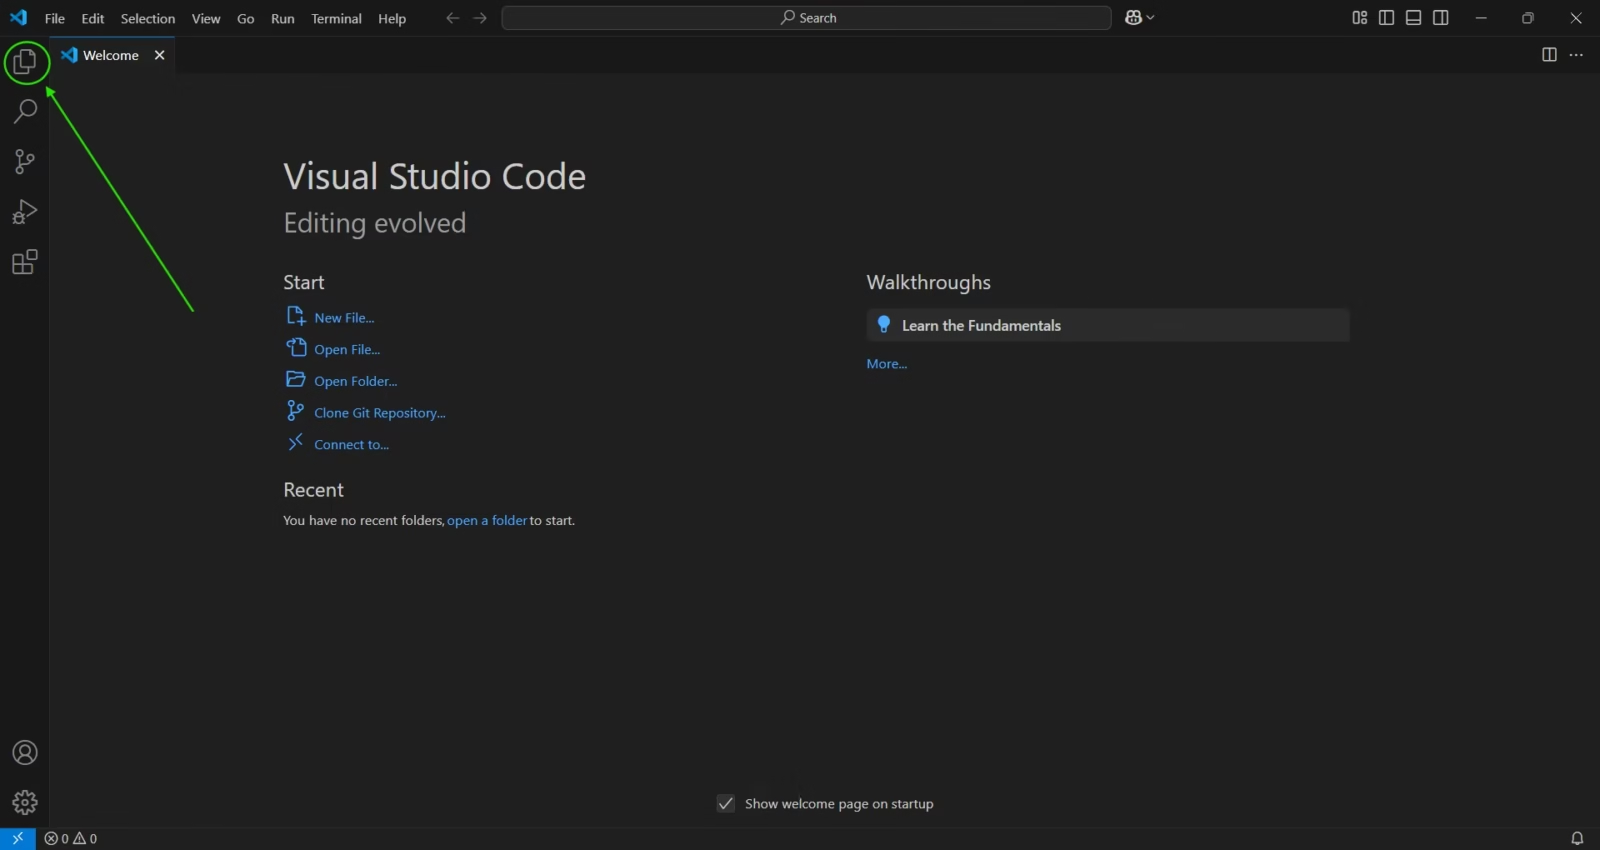
First, we’ll go to Explorer in VS Code and create a folder where we need to save our coding file. VS Code will have access to the folder, contents of the folder will be visible in VS Code. Then we’ll directly create a .js file from VS Code and work on it.
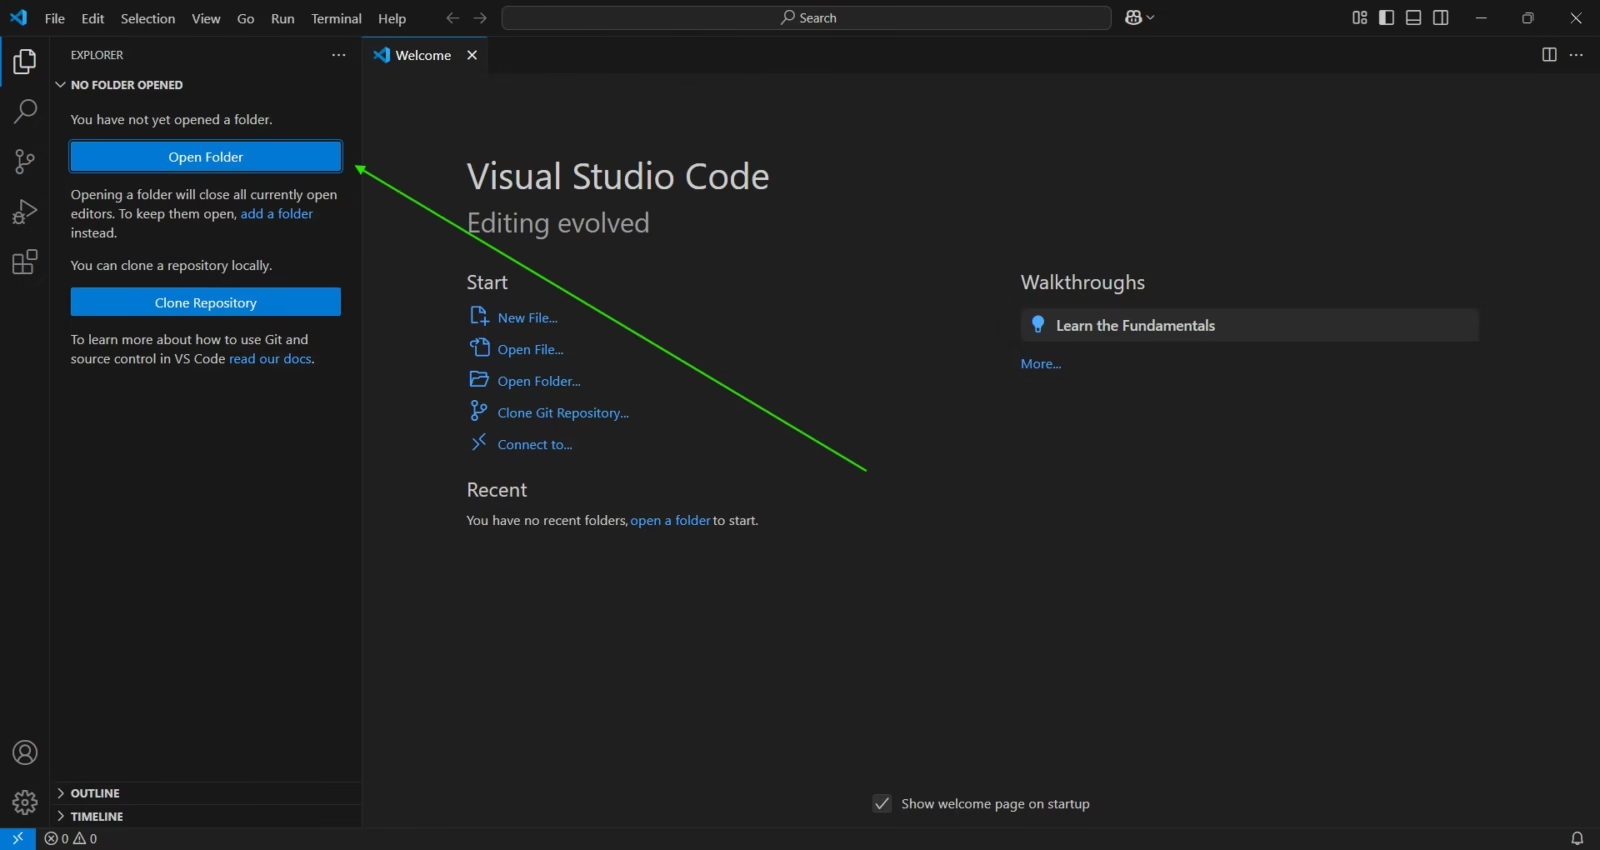
Go to the first option in the left-side column. That option will open Explorer.
Click on “Open Folder” inside the Explorer.
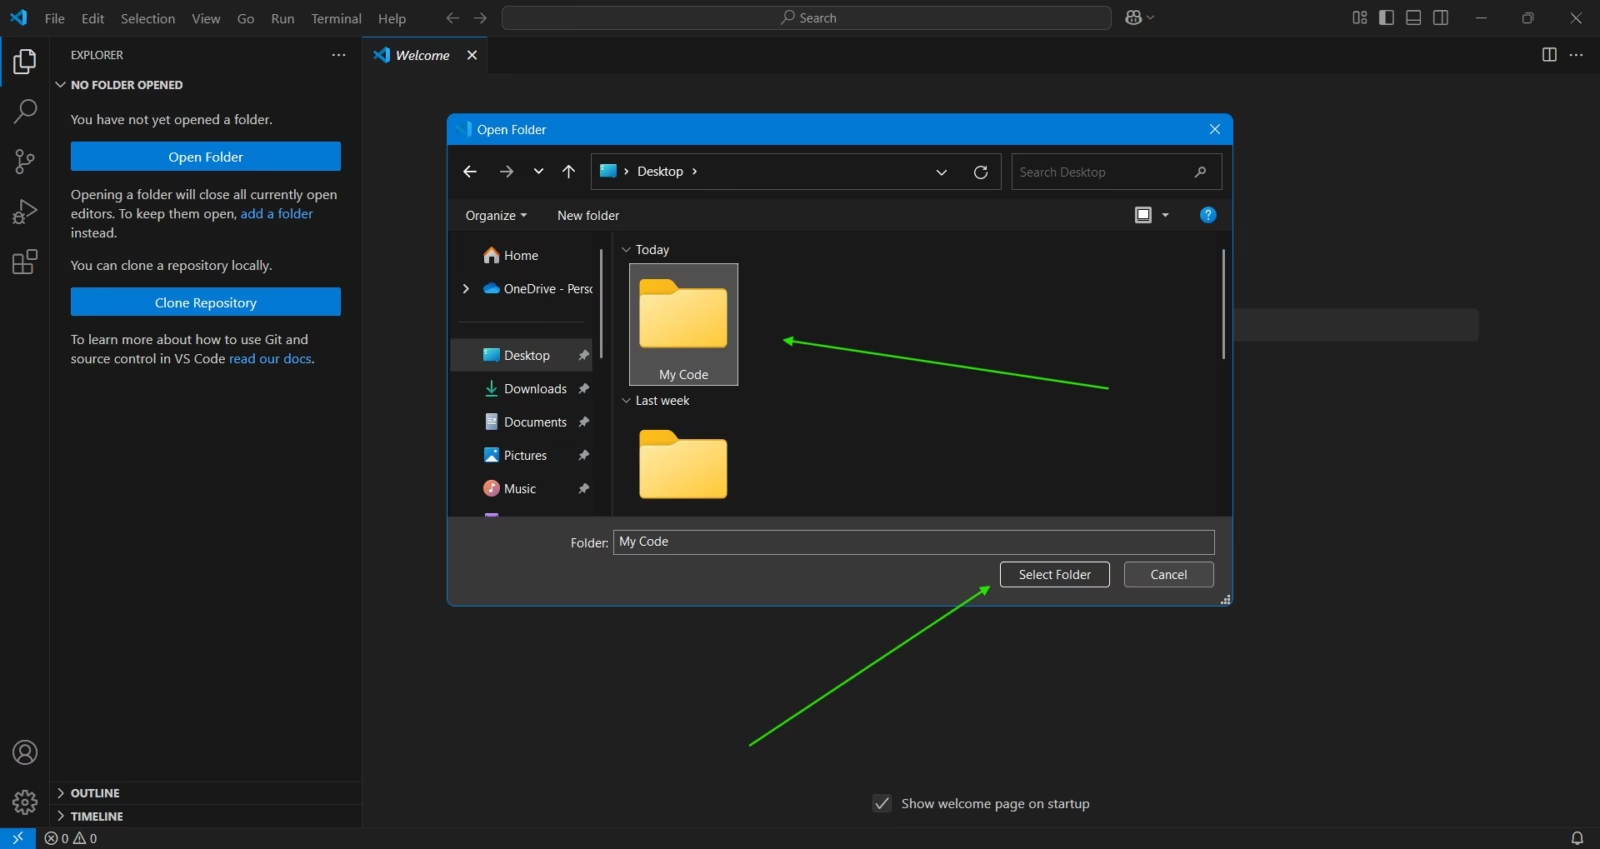
Create a folder where you’ll save your JavaScript file.
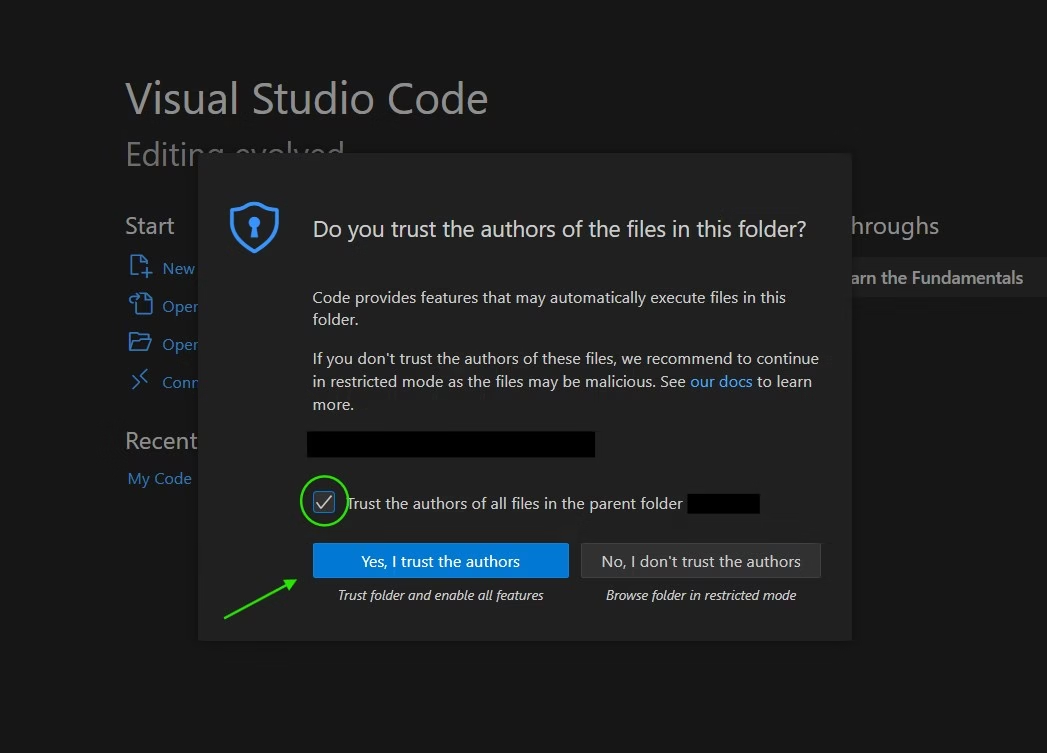
If you’re opening a folder destination for the first time you’ll see a pop-up asking whether you trust the creator of the folder or not. Simply select “Yes, I trust the author” to proceed.
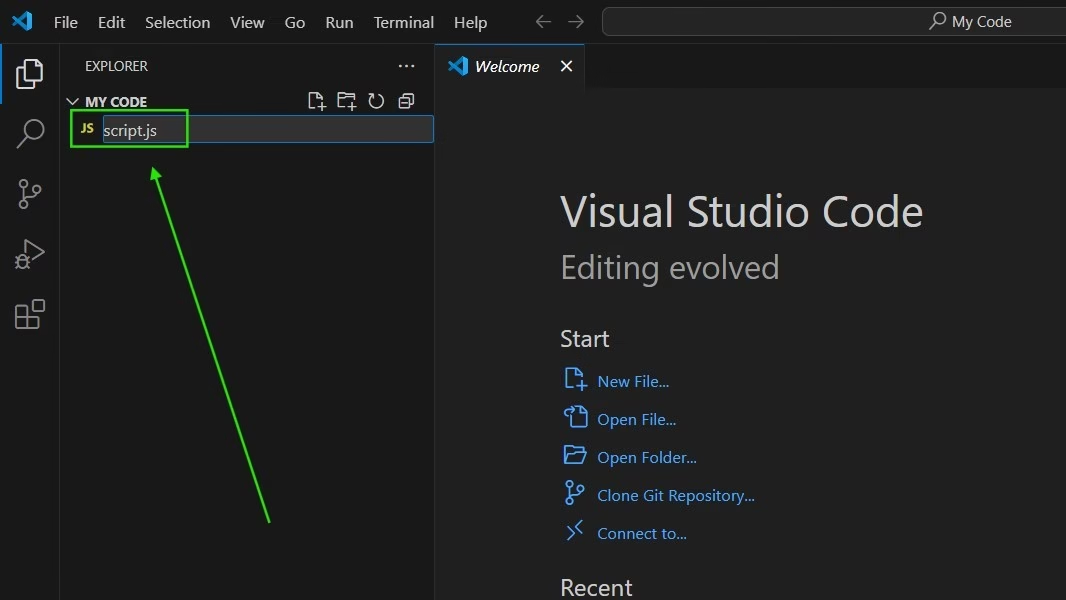
Now the name of the folder should be visible inside your Explorer along with 4 icons aligning the folder name. The first icon is for creating a file. Click there to create a file inside the folder.
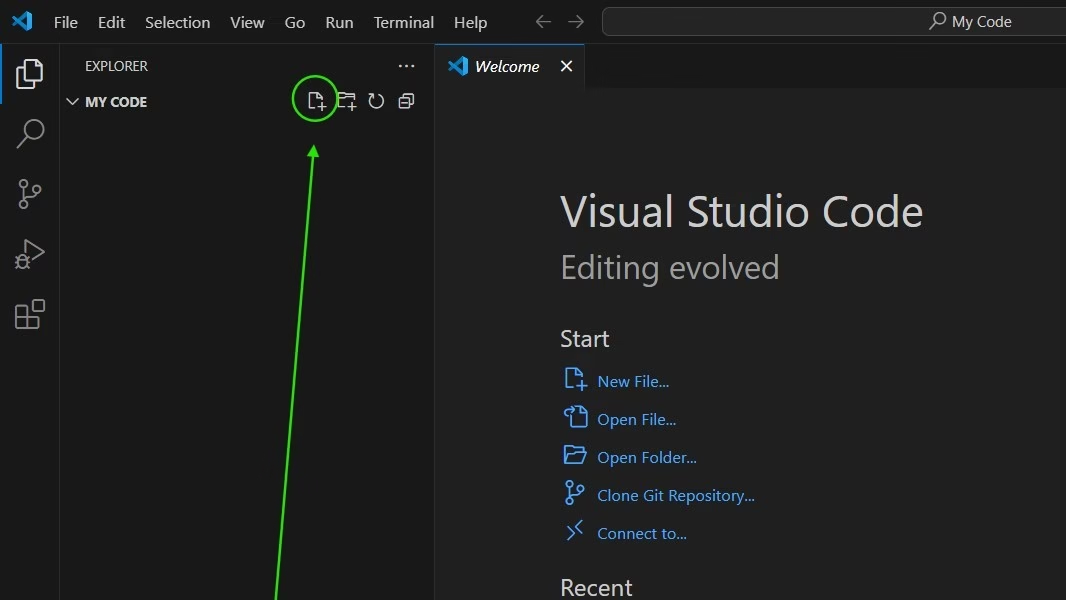
Note: Every JavaScript file has .js extension.
Now name your file script.js.
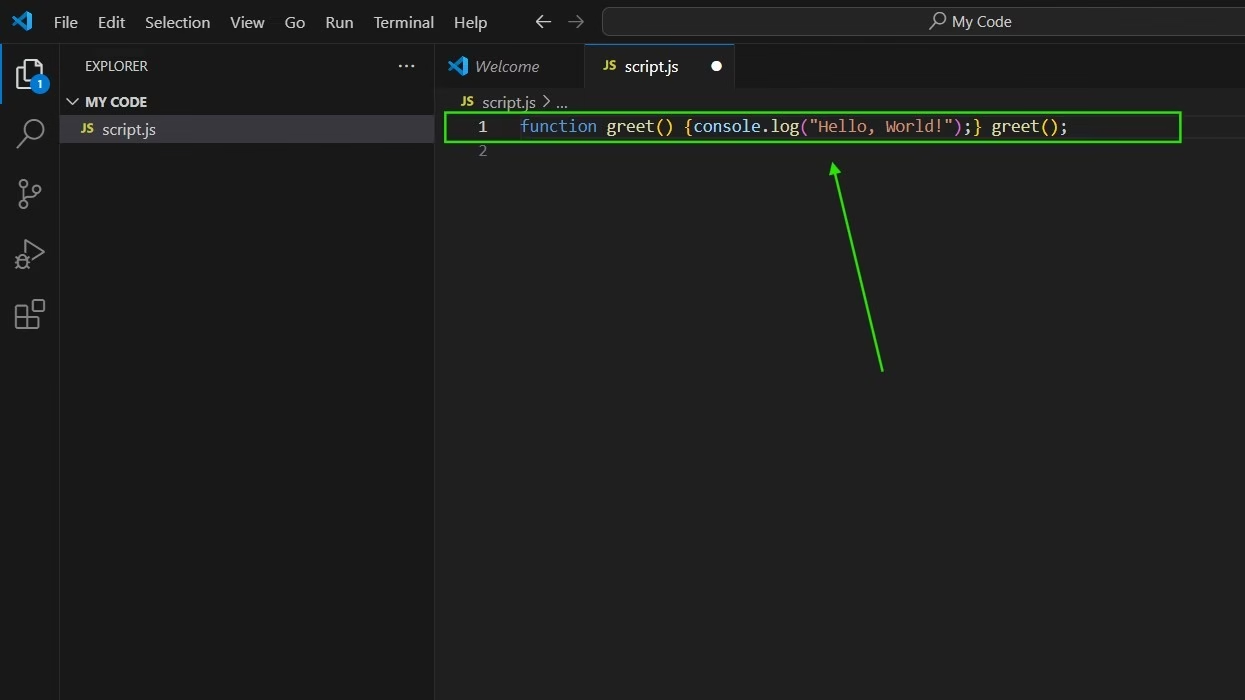
Now copy the code here and paste it inside VS Code. This code has bad formatting.
function greet() {console.log("Hello, World!");} greet();Paste the code inside VS Code as shown in the screenshot below. Perttier should automatically correct it when you minimize or go to another tab inside VS Code.
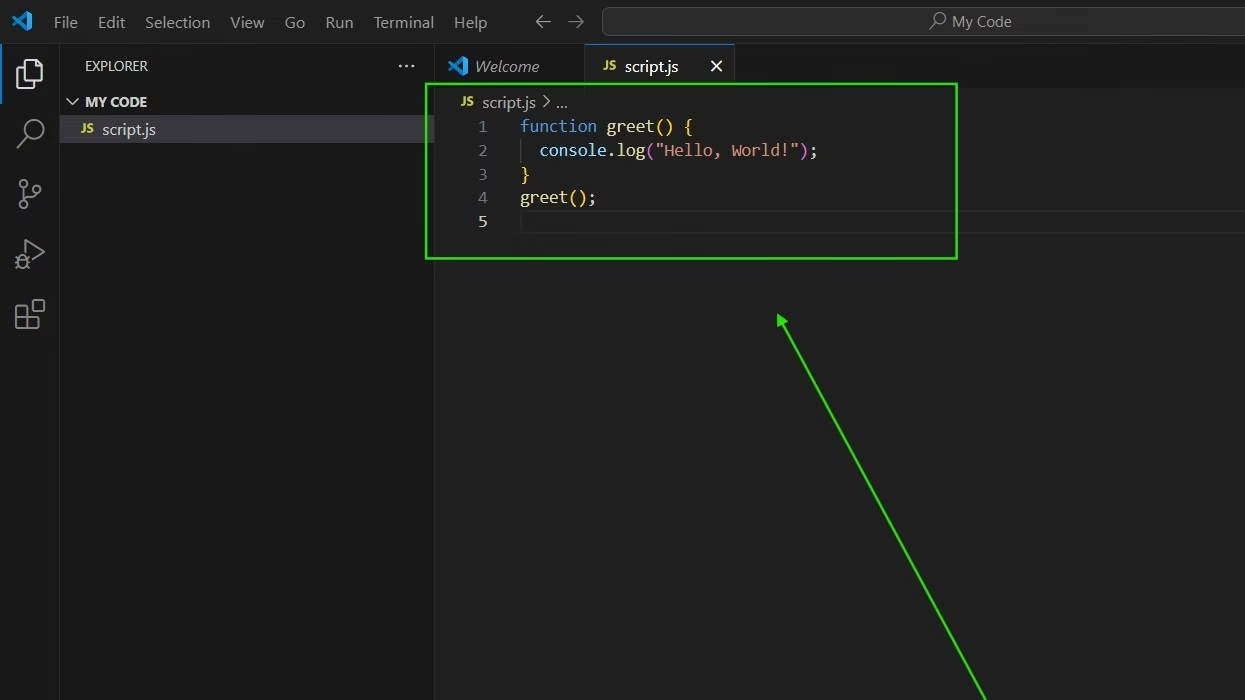
Now minimize your VS Code window and then maximize it again to check whether the Prettier Code Formatter works automatically or not. As an alternative, you can also save your file with CTRL + S and auto formatting should do its job.
As shown in the screenshot below your Prettier should start working.
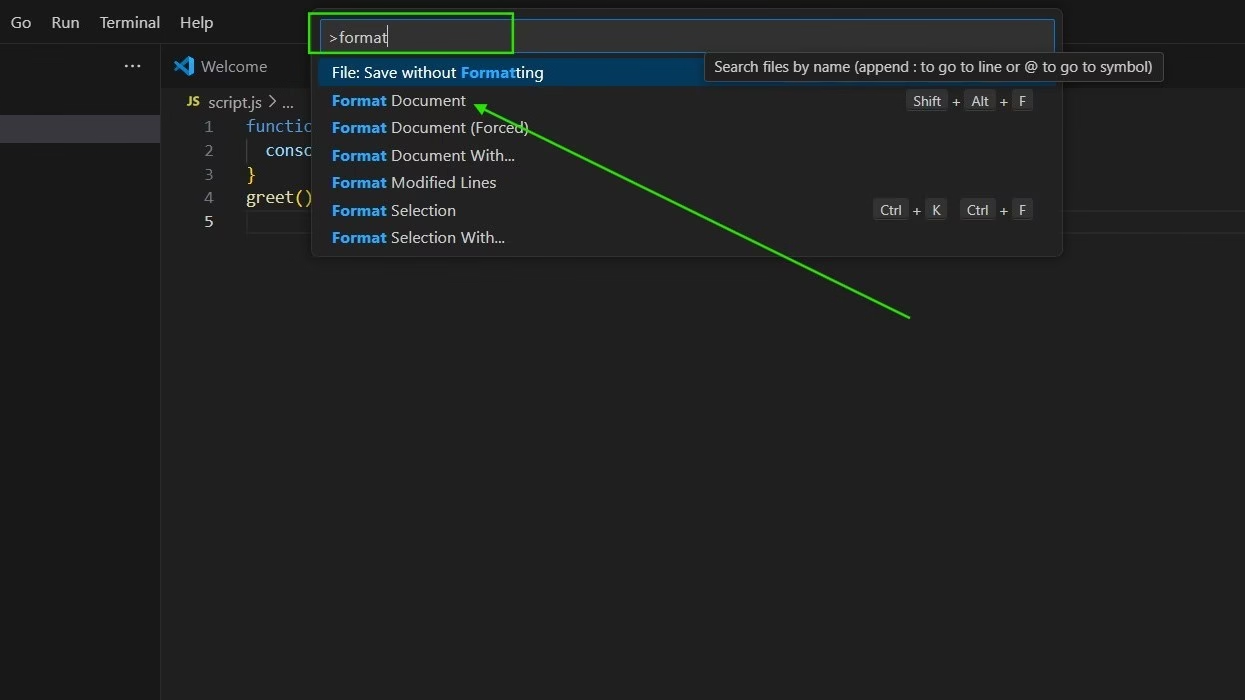
If Prettier Code Formatter is not working you simply have to type >format inside VS Code search bar and select Format Document. Follow this only if Prettier Code Formatter does not automatically work when changing tabs for changing windows.
Now your Prettier Code Formatter should start working. Now let’s install another plugin. This plugin is very useful and it will open a web browser inside VS Code.
Install Code Runner
When you start learning JavaScript you need to see the results of running your code. Code runner gives output of your code so that you can see such output in your VS Code.
But to use Code Runner for JavaScript on your PC, you need to install Node.js.
Note: Node.js is a runtime environment for JavaScript. JavaScript was created for the web, so to run JavaScript on a local computer you need to install a runtime environment.
Now, let’s install Node.js.
Download Node.js from the official website and run the file.
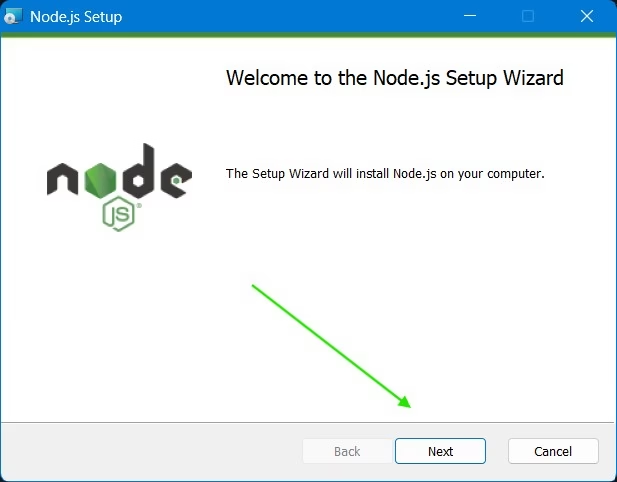
Click next to proceed to the next step of installing Node.js.
Note: During installation, your computer may ask for additional permission with a popup window so give permission to proceed.
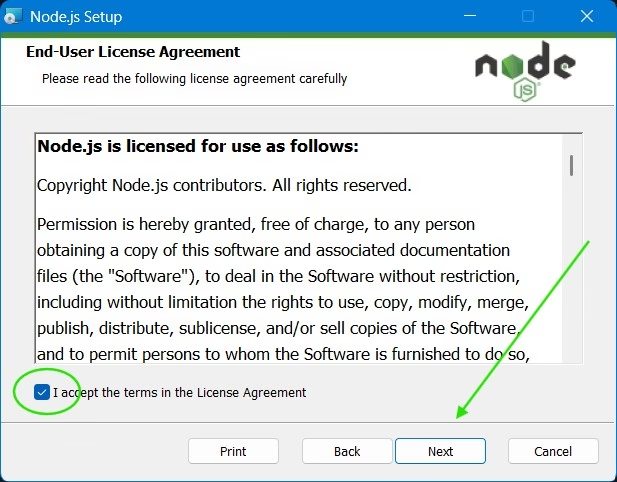
Read the Node.js licence and click next to proceed to the next step.
Choose where you want to install node.js on your PC.
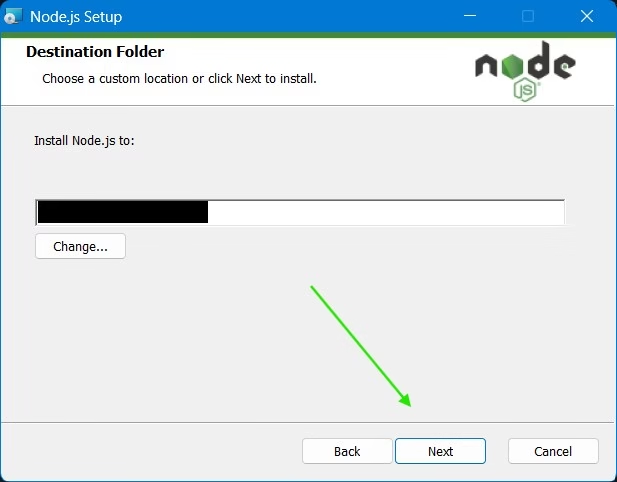
Click next to proceed to the next step, you don’t need to do anything here.
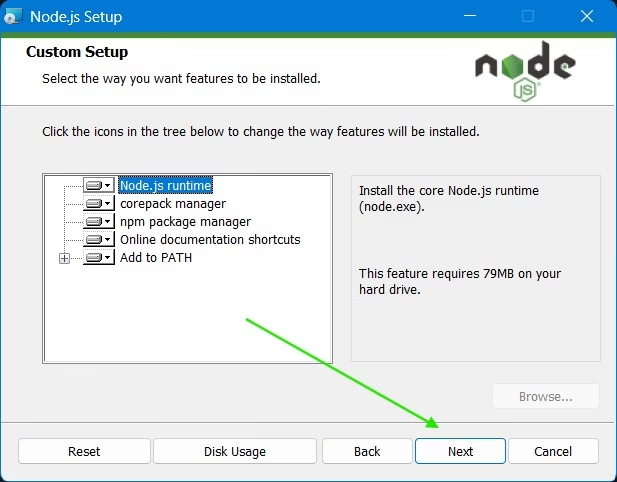
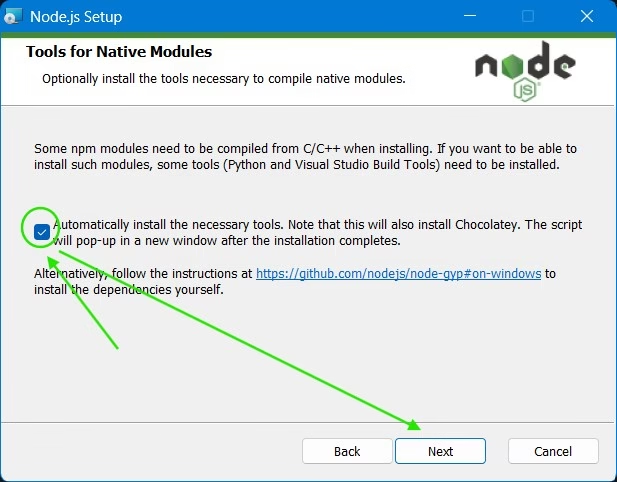
Node.js requires additional applications to be installed to work properly, so mark the checkbox and proceed by clicking next.
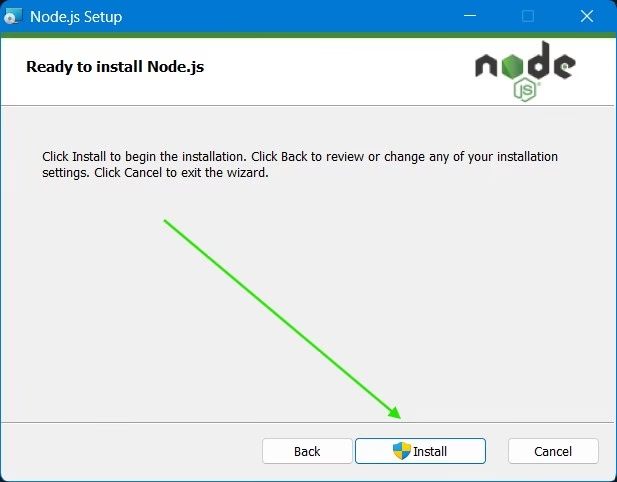
Start installing Node.js on your PC.
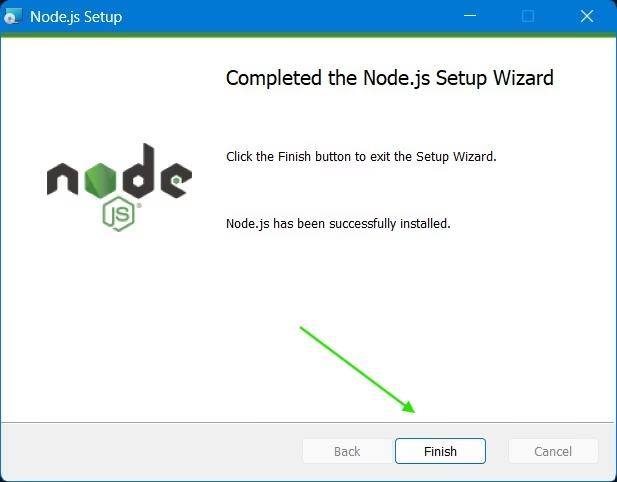
After you click click finish additional necessary application will start installing automatically.
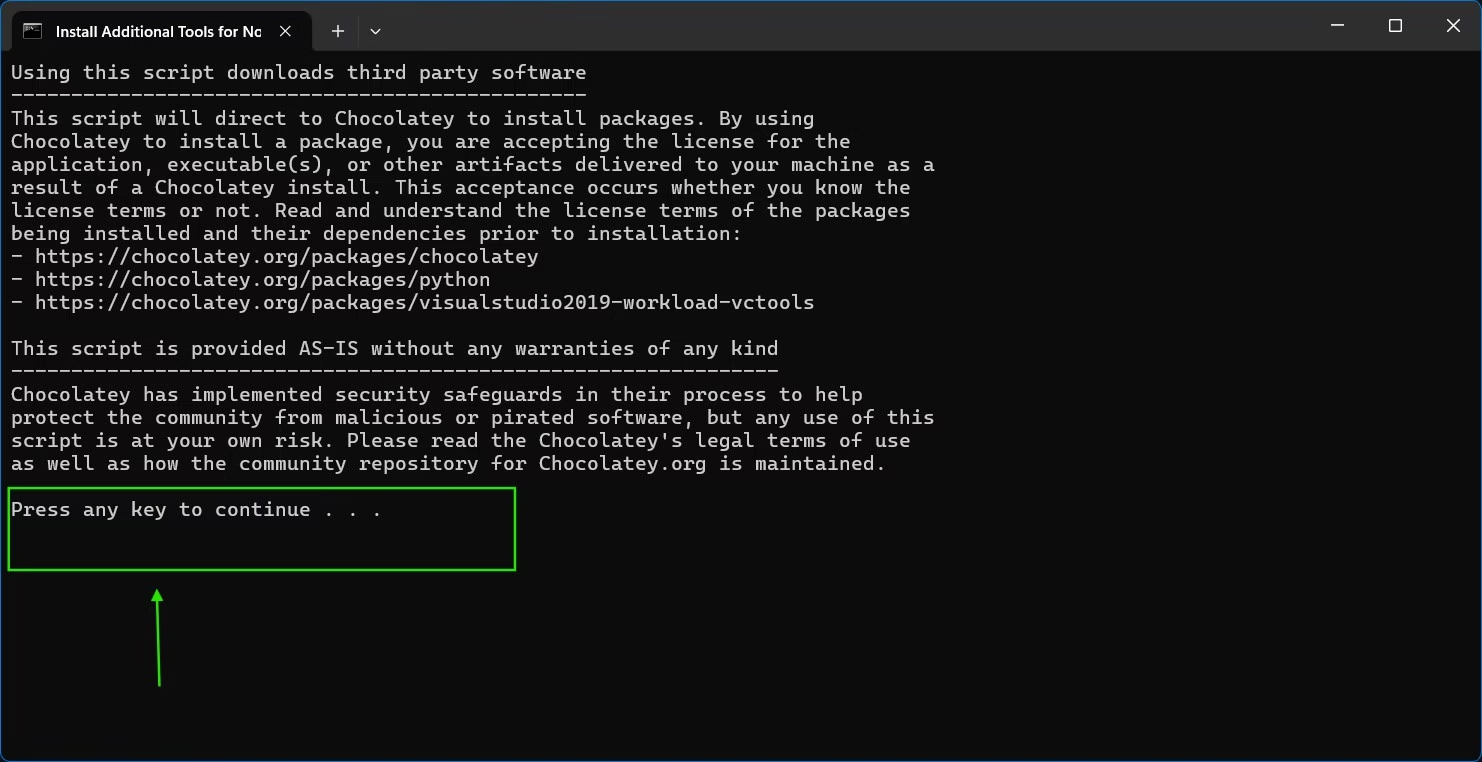
Additional applications will automatically install you just need to press any key while opening this tab.
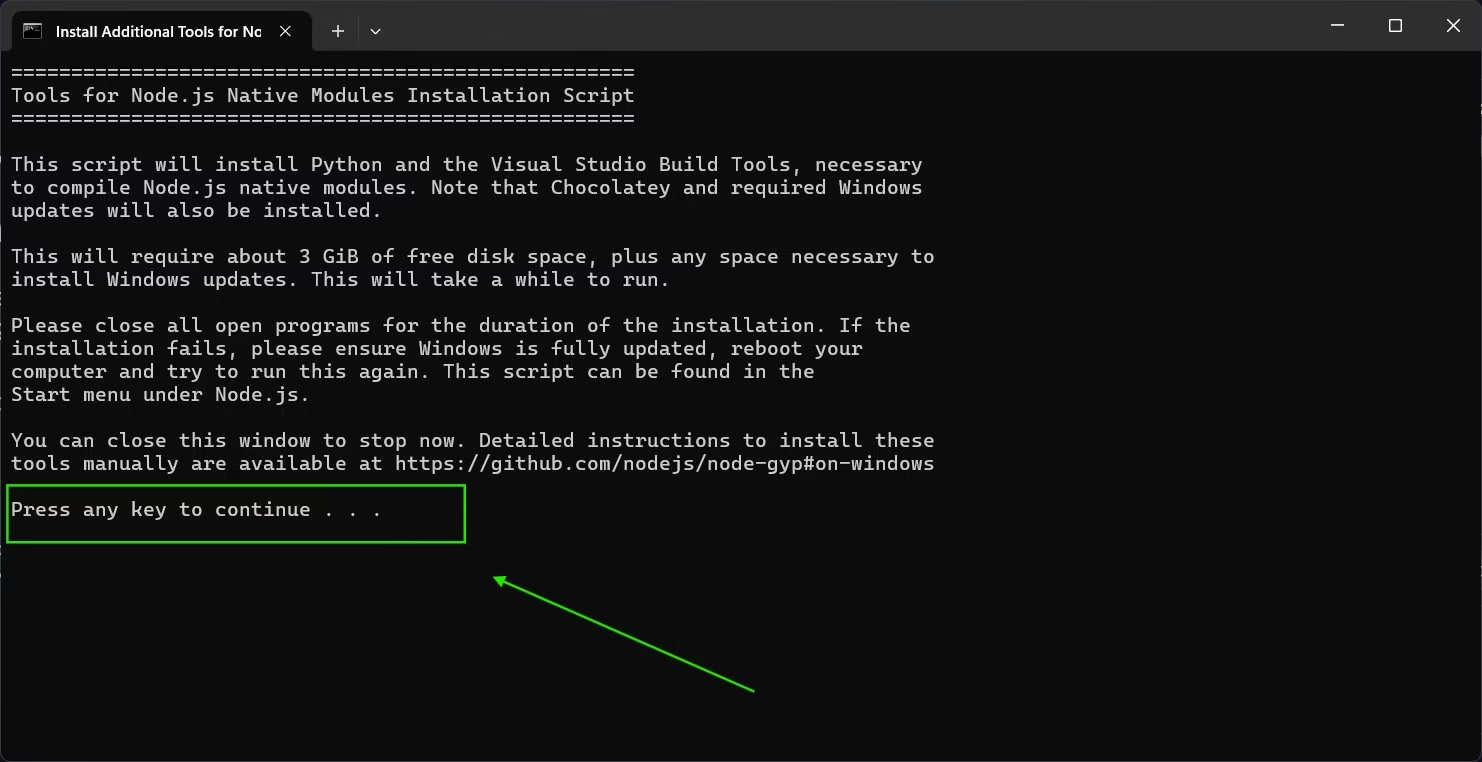
Press any key to continue again when the installation window shows this message.
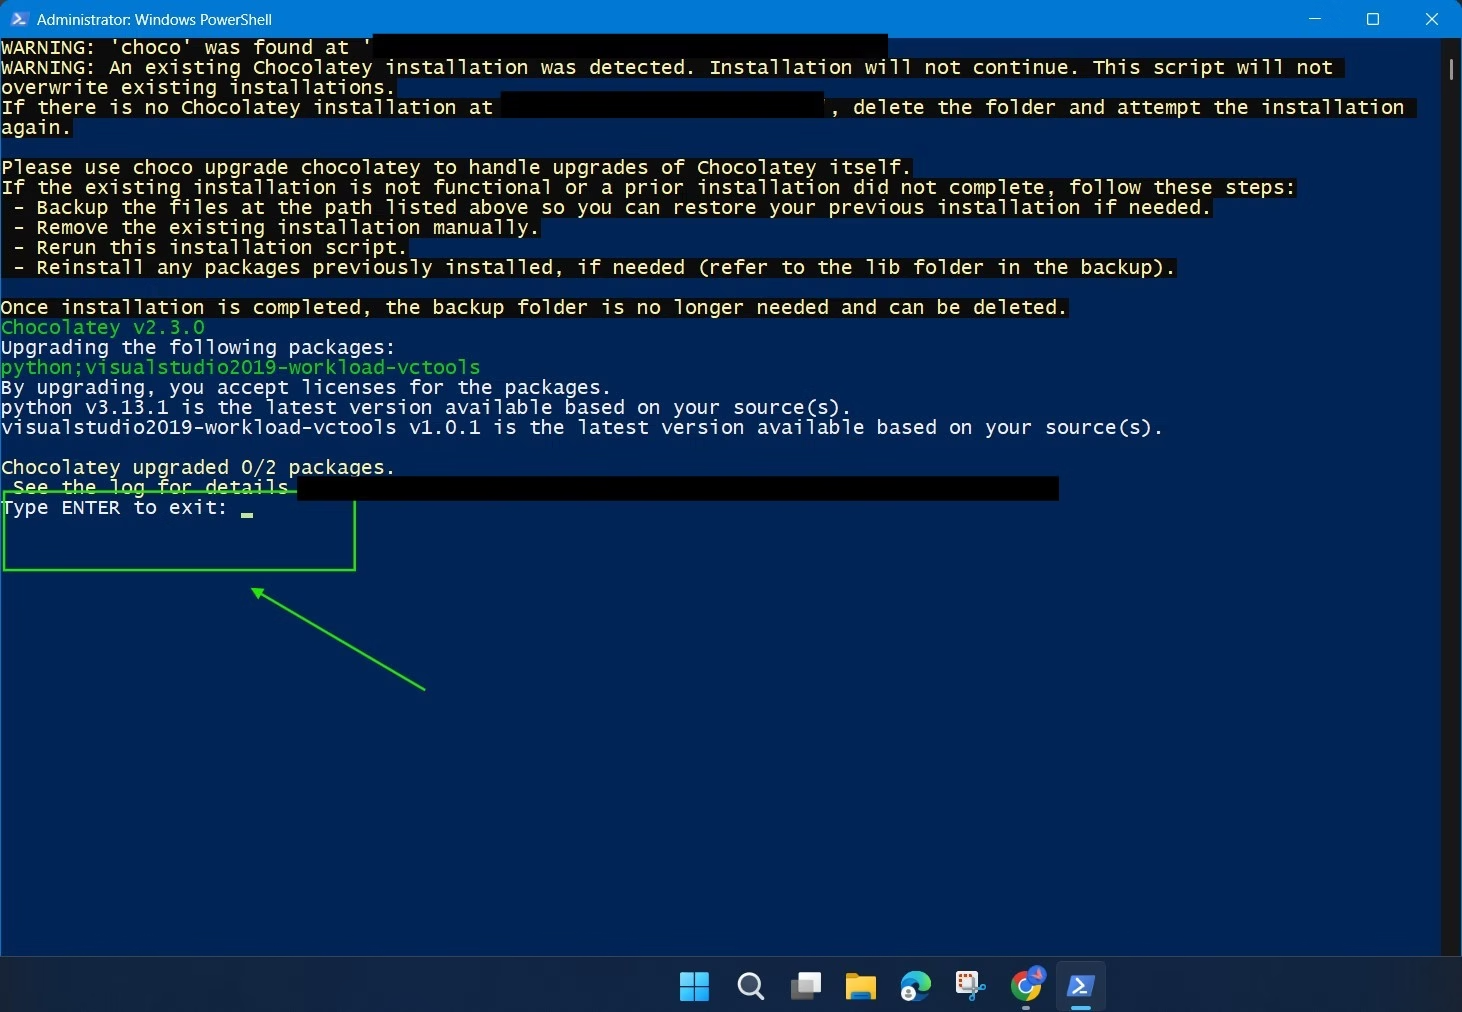
No need to panic if you get a warning like this. If an application requires to be installed it will be installed. Simply click ENTER to exit the window.
Now Node.js should be installed on your PC successfully. Now you can proceed to and install Code Runner.
If you have closed VS Code then open it again to install Code Runner.
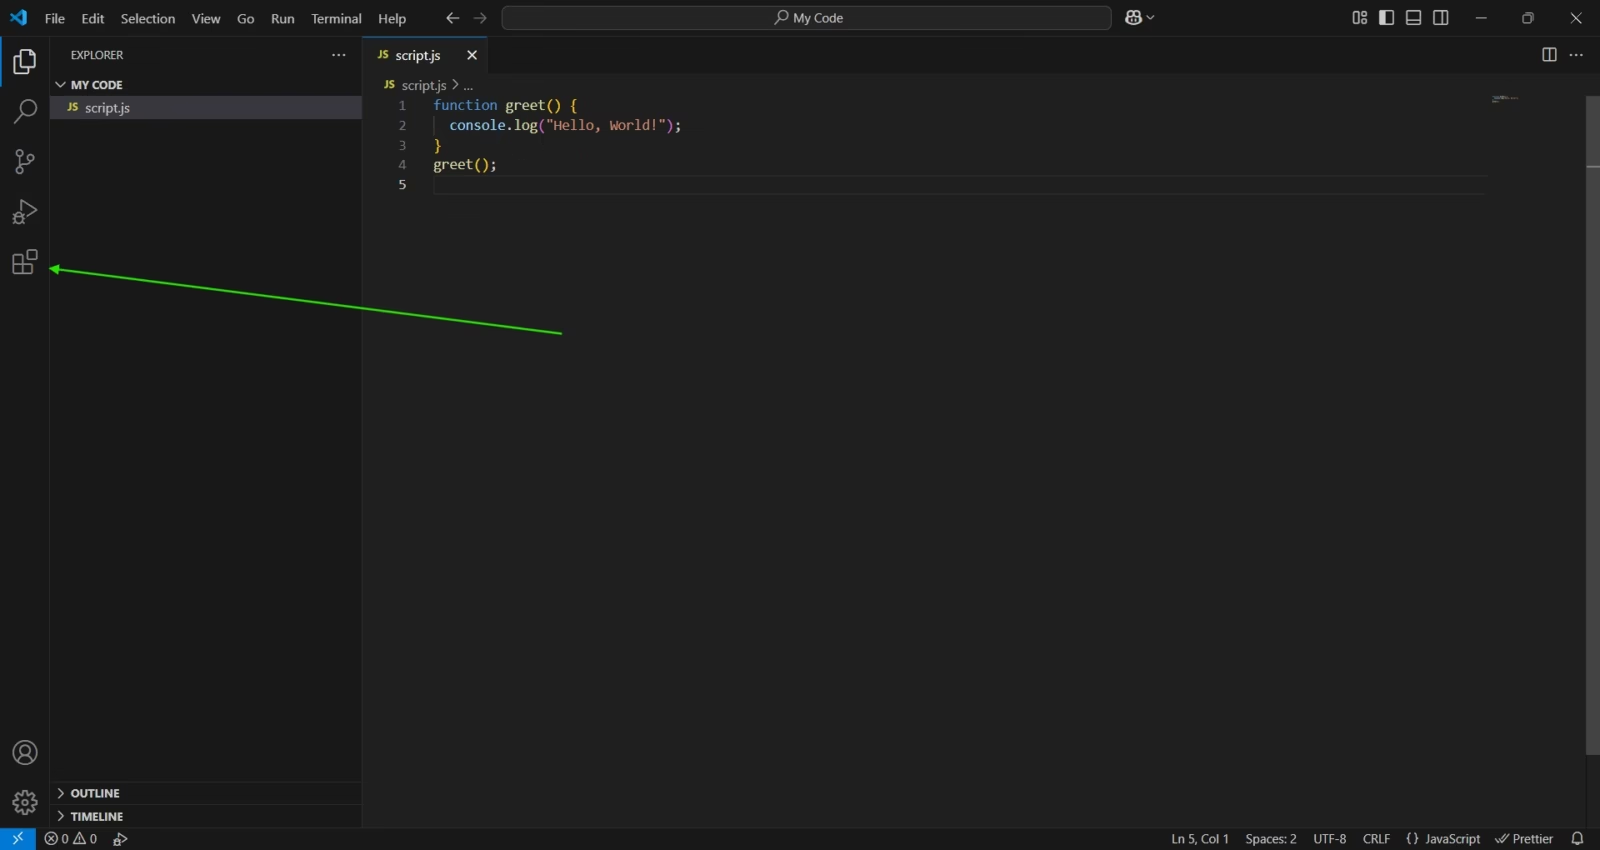
Go to Extensions in the left-side column.
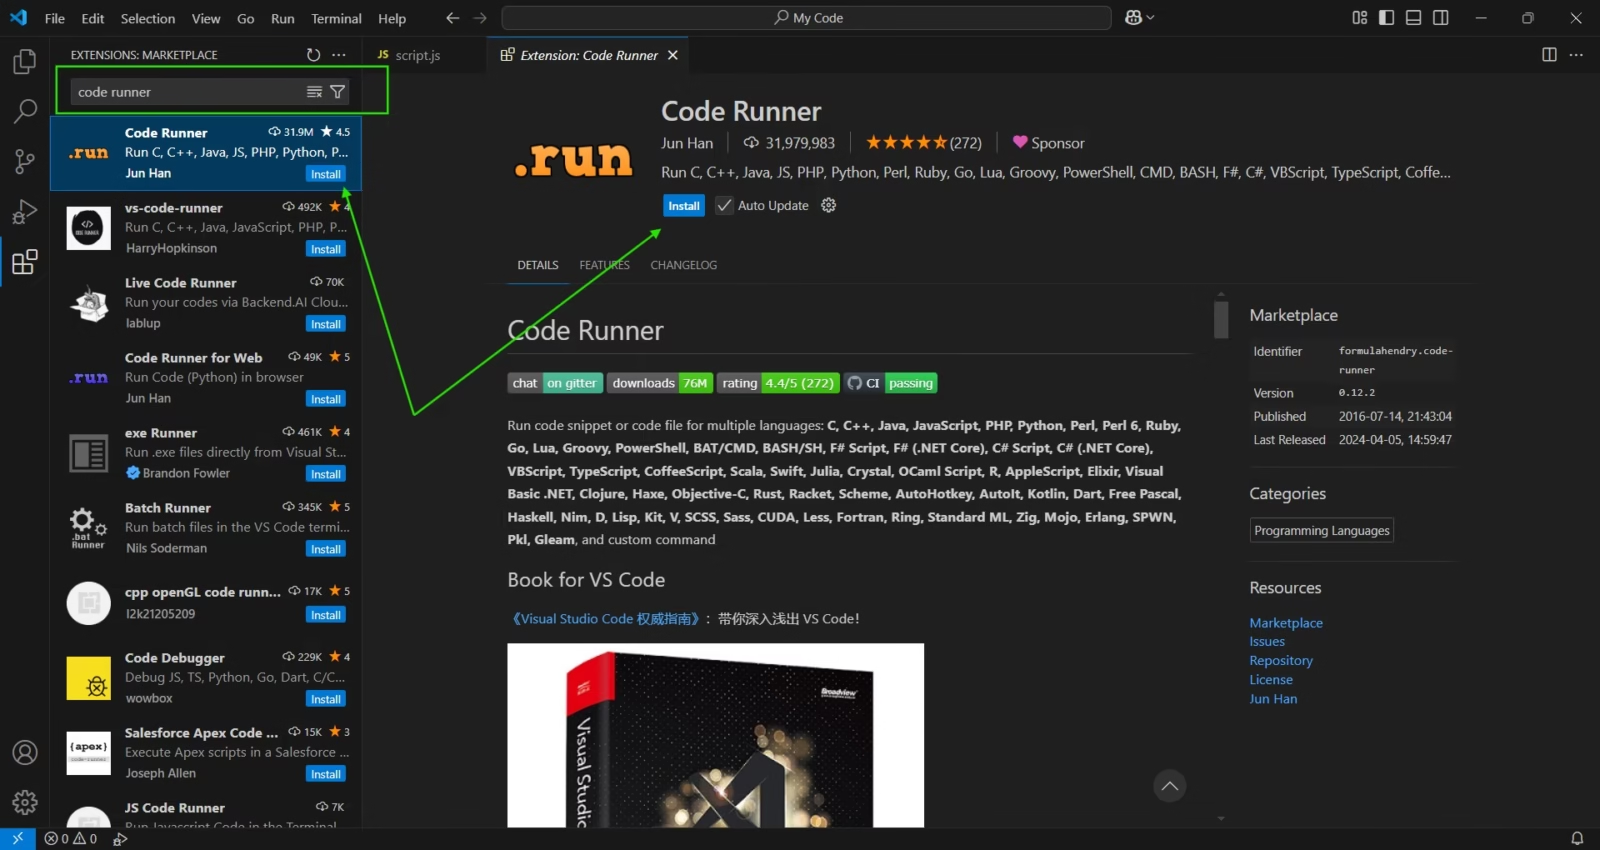
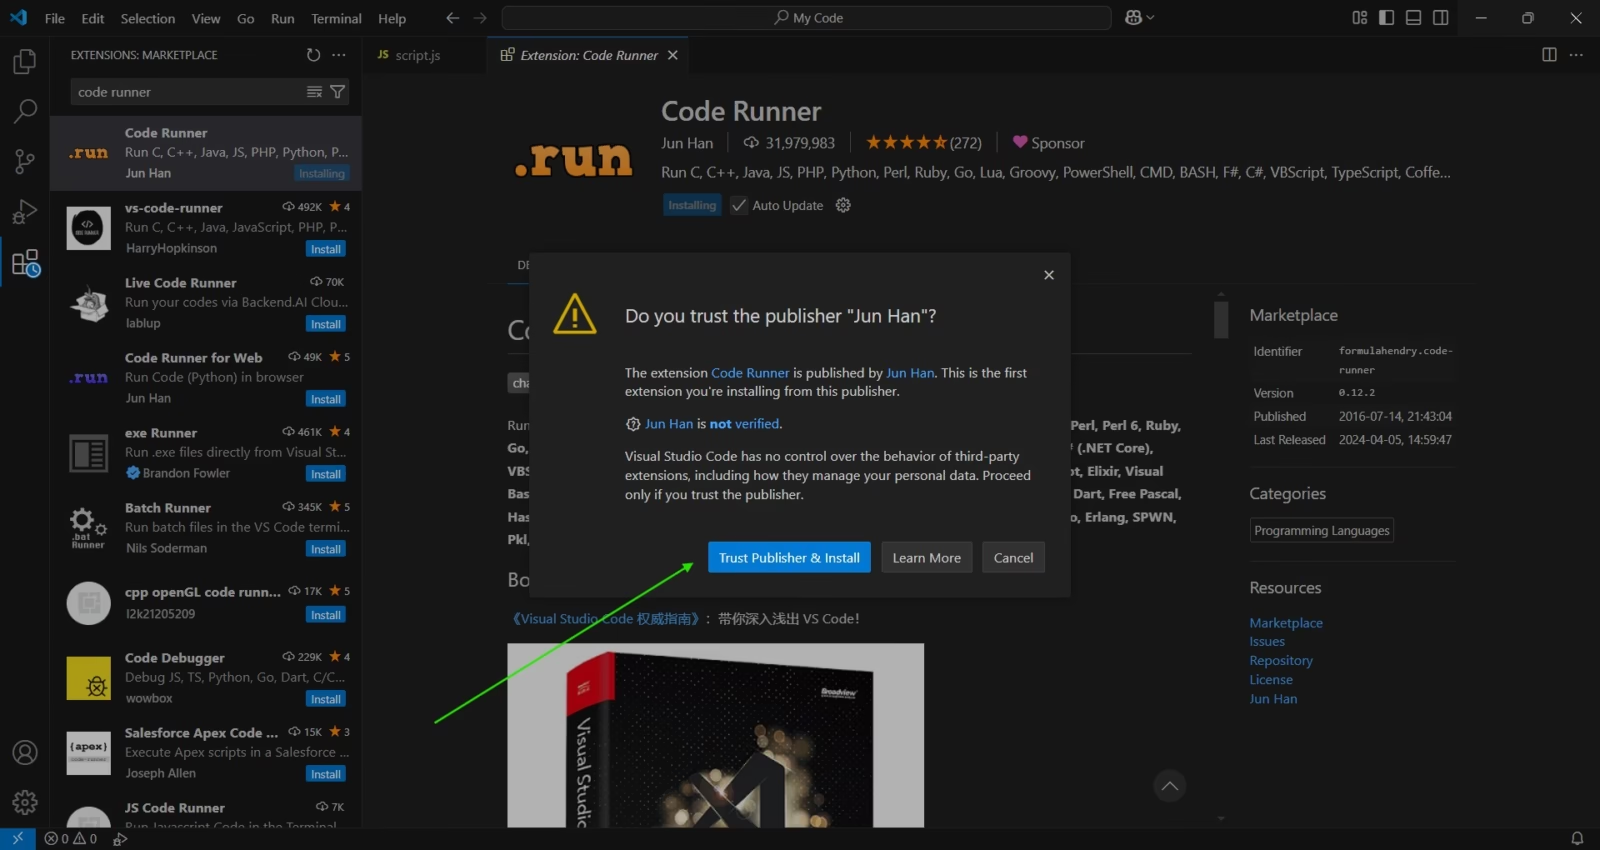
Now after opening Extensions, search “Code Runner” in the search bar of Extensions and click on Install.
Code Runner is not a verified extension of VS Code, so you may get this pop-up. Click on Trust Publisher & Install.
After installing the Code Runner extension open the previously created JavaScript file and click on the play button located in the upper right corner. You’ll see the Output “Hello, World!” below.

Now you can start learning JavaScirpt within your PC.
Along with Code Runner, you can also use Web Browser to see the results of your JavaScript code. To use a web browser inside VS Code, you can install Microsoft Edge Tools for VS Code Extension. This extension will also help you with font-end development with HTML & CSS.
Install Microsoft Edge Tools for VS Code (Optional)
When you start working on your front-end, you need to open your browser again and again to check the changes. Microsoft Edge Tools for VS Code opens the web browser inside VS Code along with the web browser’s developer tool.
Note: You need to install Microsoft Edge on your computer to work with this tool. Windows comes with pre-installed Microsoft Edge, so if you’re a Mac or Linux user then you have to install it to open the browser inside VS Code.
This tool is especially helpful for those who first learned HTML & CSS first and then started learning JavaScript.
With the help of this extension –
- You can check your web design directly on different types of screens.
- You’ll be able to check the developer’s tool on your web browser.
- You’ll be able to change your code directly inside the developer’s tool and changes will be updated in your code file.
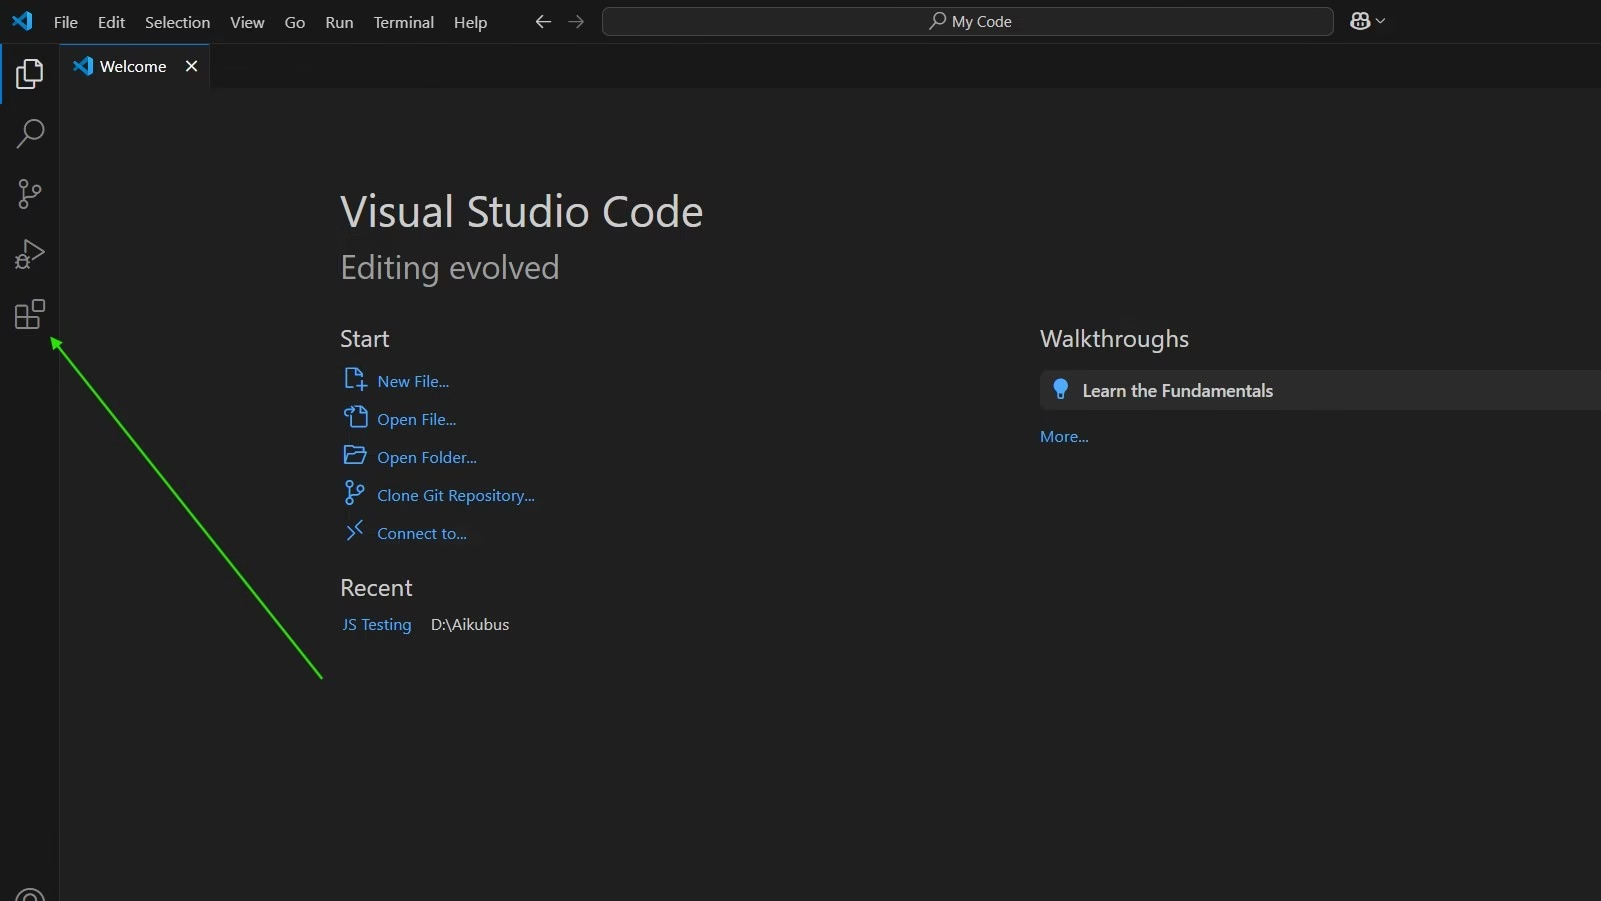
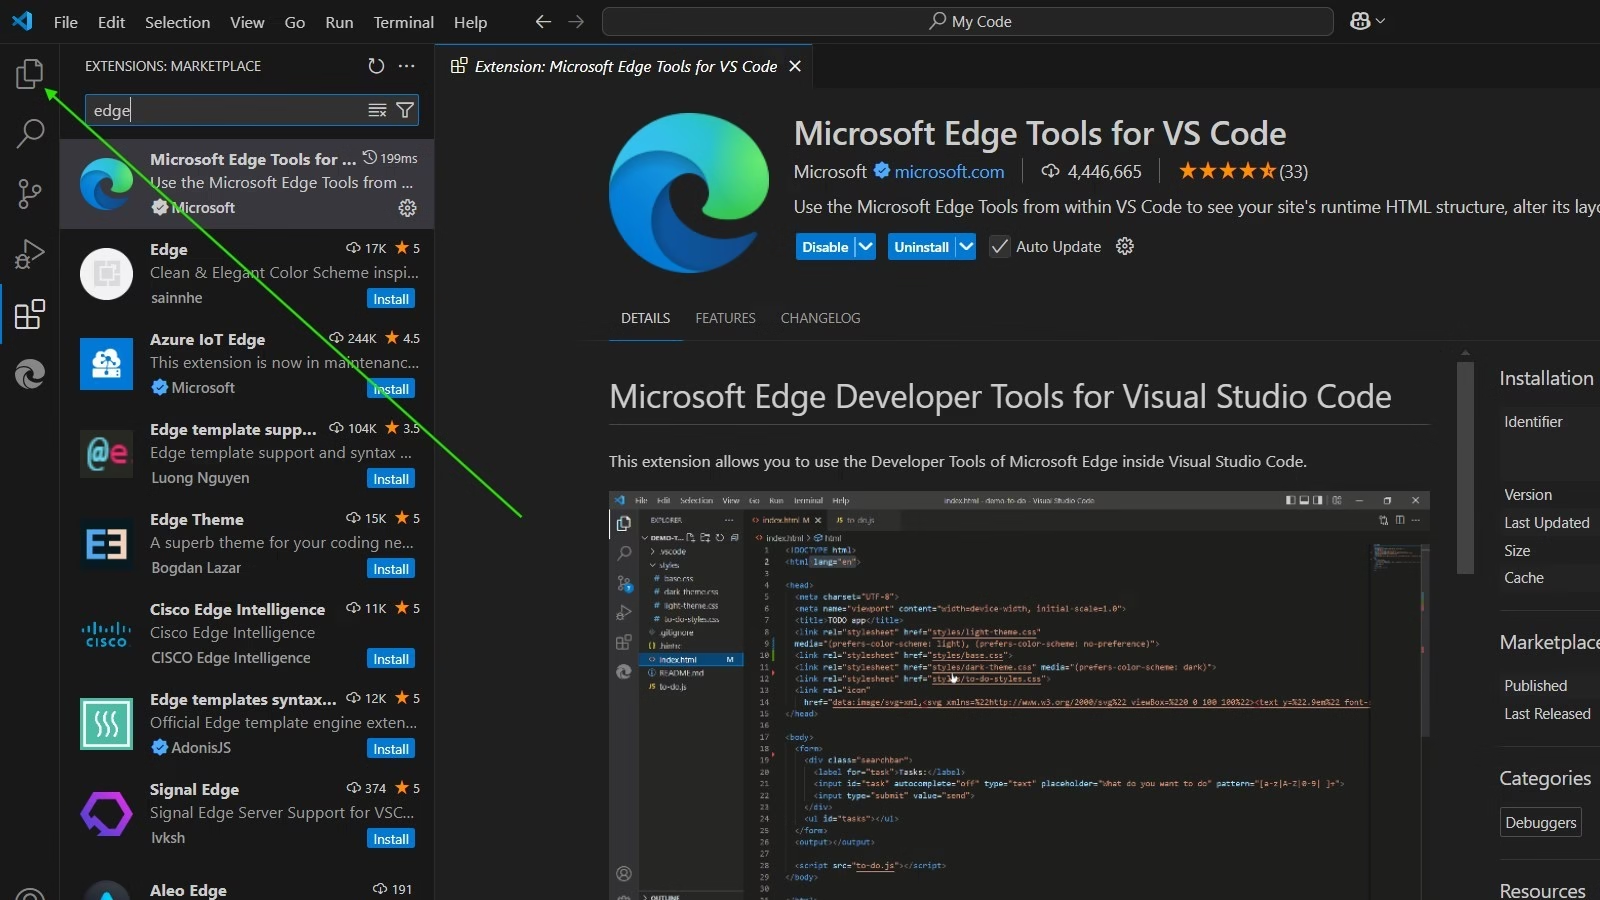
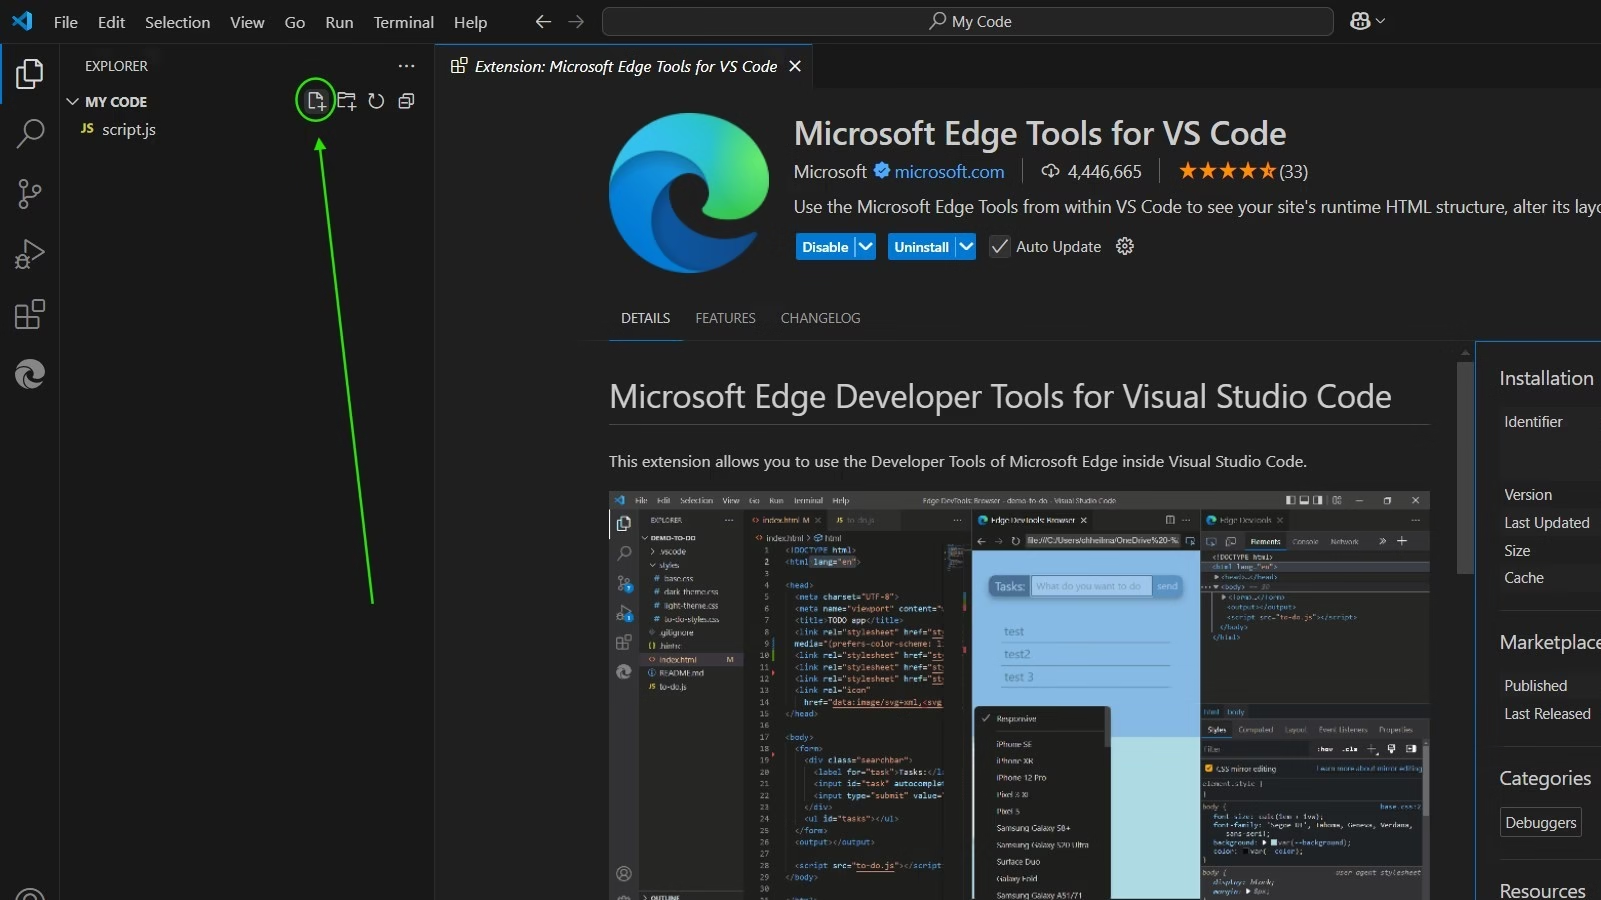
To install Microsoft Edge tools for VS Code go to VS Code Extensions from the left side column.
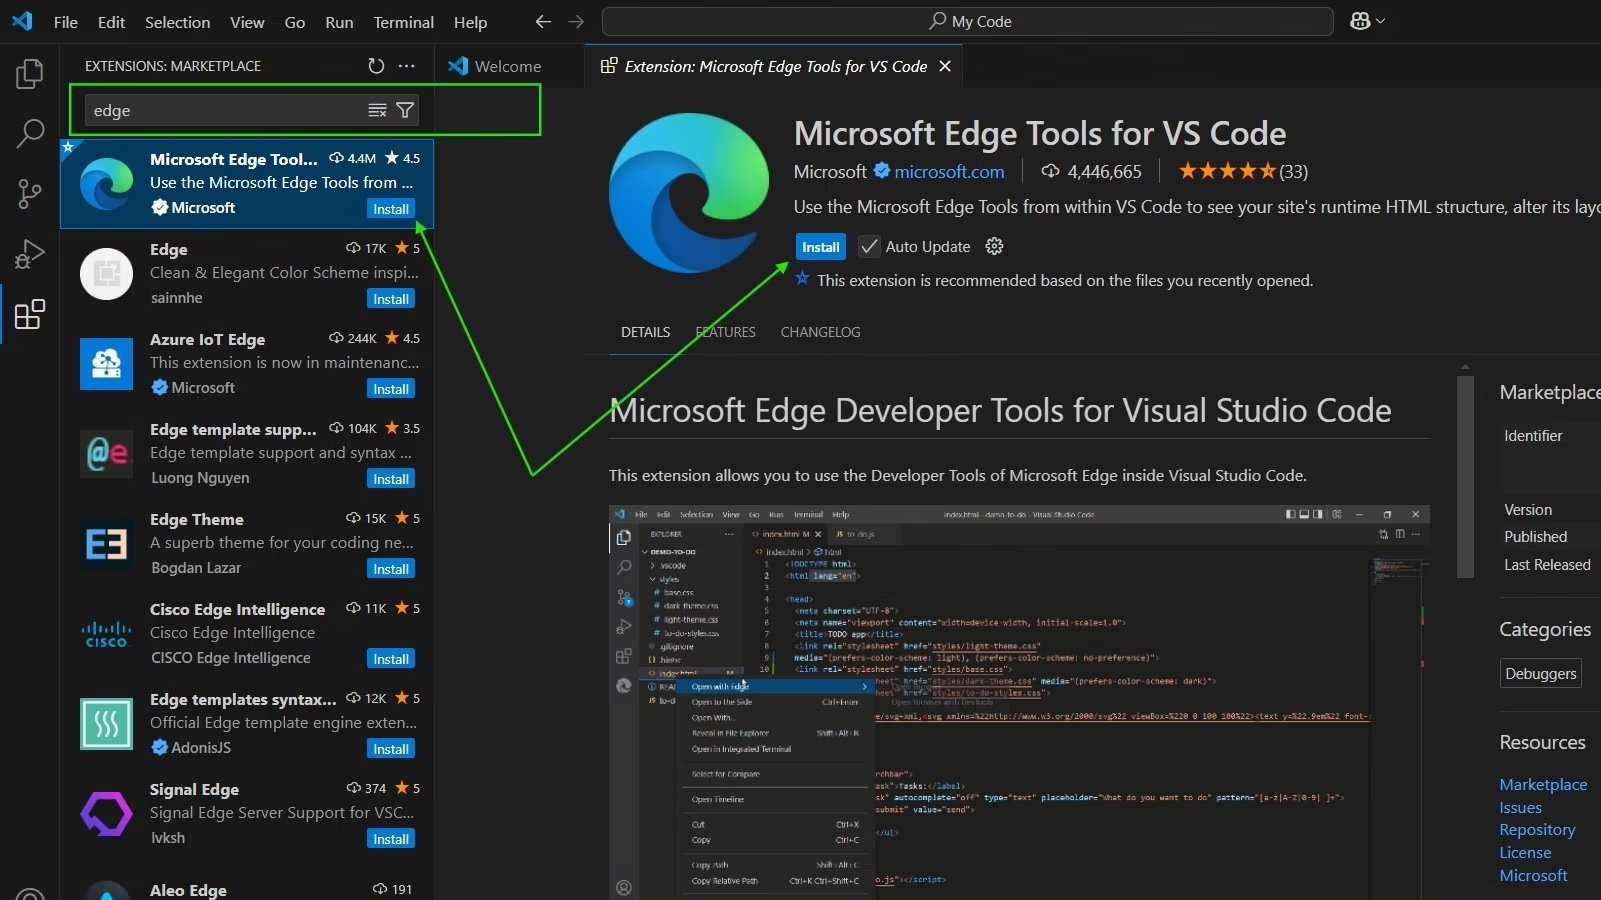
Then search “edge” inside the Extention search bar to find Microsoft Edge tools. Official Extension has a blue tick. You have to install that one.
After installing the Microsoft Edge tools we need to check if it’s working. To check if the Extension is working we need to create a HTML file then check if it is working. Open the HTML file in the Browser with the help of extension.
To create a HTML file, go to Explorer inside VS Code.
Now in the same folder where you have created your JavaScript file, click on the “file icon” to create a new file.
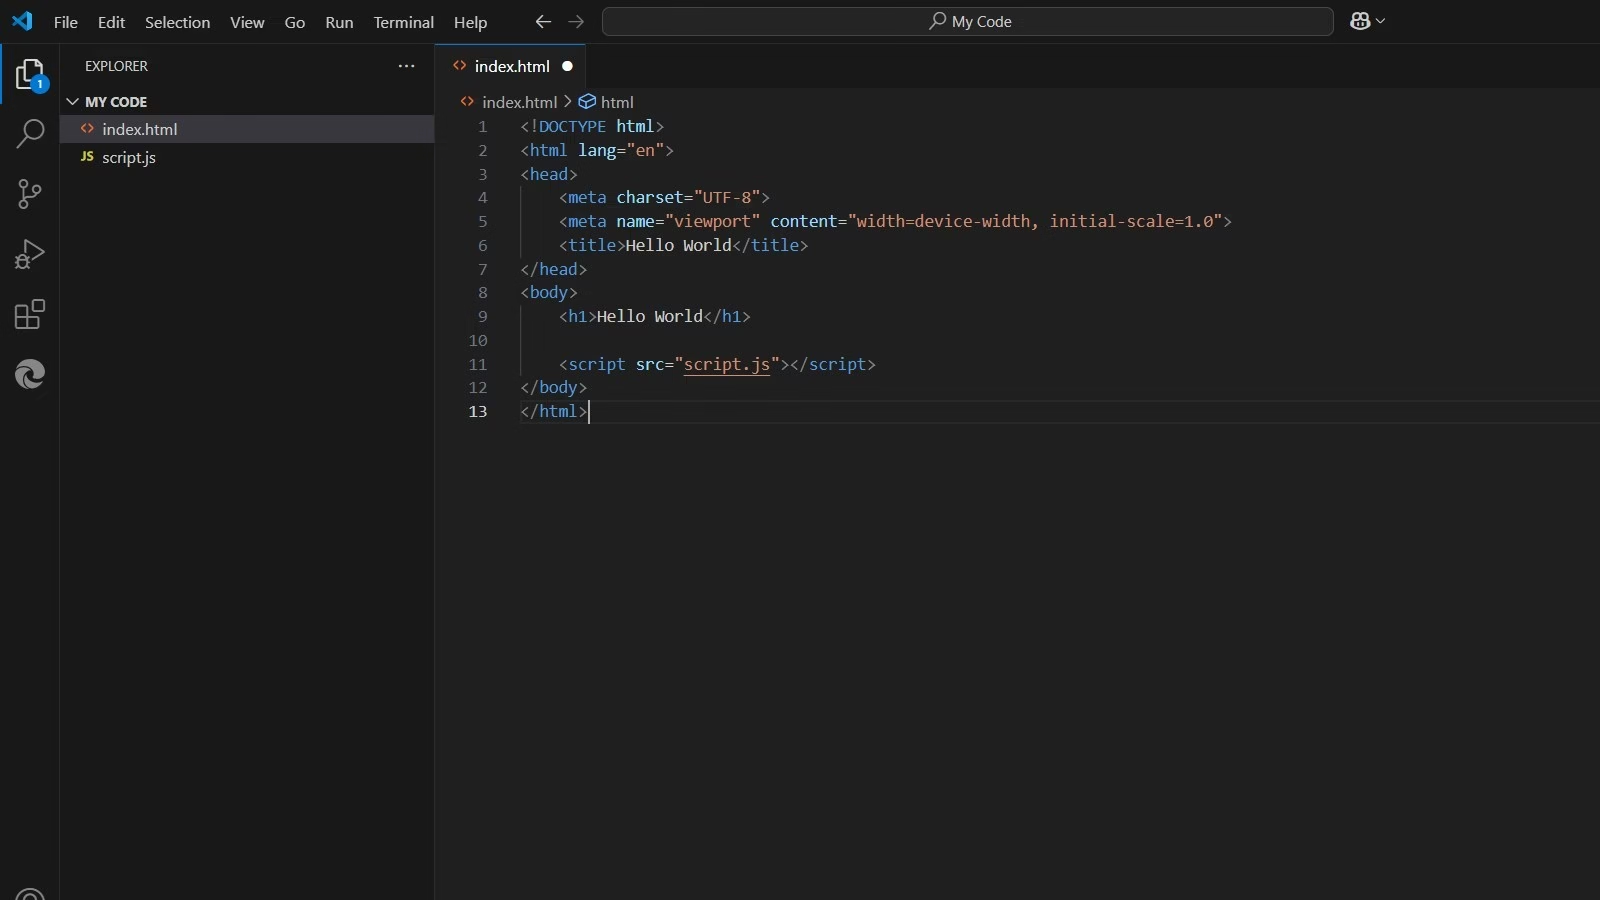
Now create index.html file. This will create an HTML file.

Now copy the code below and paste it into your HTML file.
<!DOCTYPE html>
<html lang="en">
  <head>
    <meta charset="UTF-8" />
    <meta name="viewport" content="width=device-width, initial-scale=1.0" />
    <title>Hello World</title>
  </head>
  <body>
    <h1>Hello World</h1>

    <script src="script.js"></script>
  </body>
</html>
Paste your code as shown in the screenshot below.
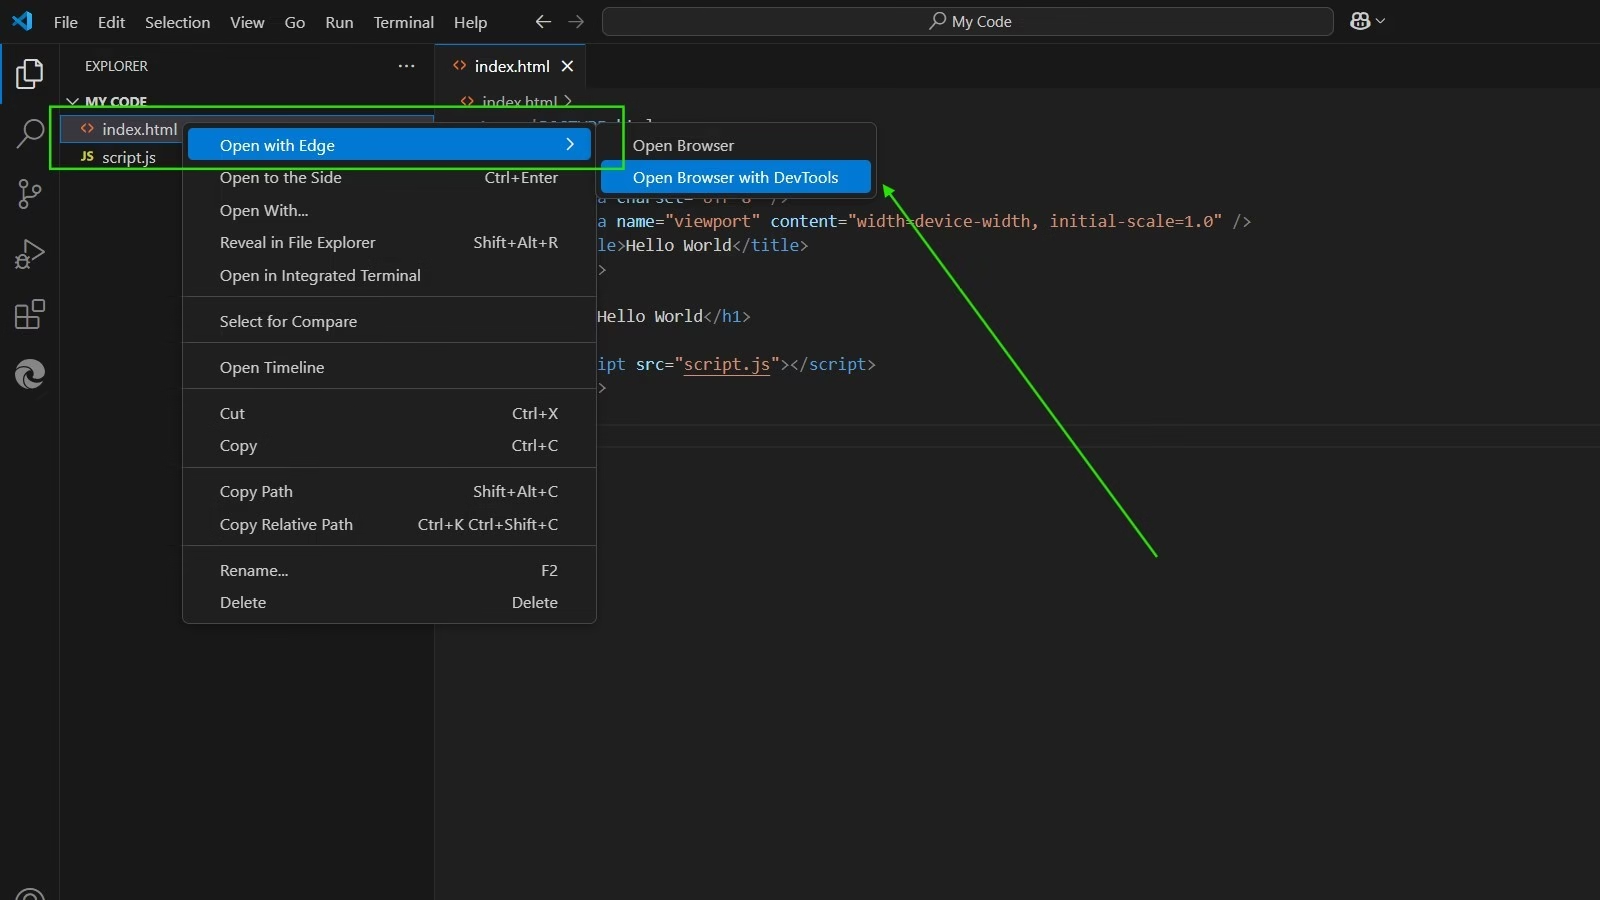
Now right-click on your HTML file and go to Open with Edge > Open Browser with DevTools to open Microsoft Edge Tools with VS Code.
As you can see in the screenshot below you can see your HTML CSS & JavaScript in the developer tool along with a web browser.
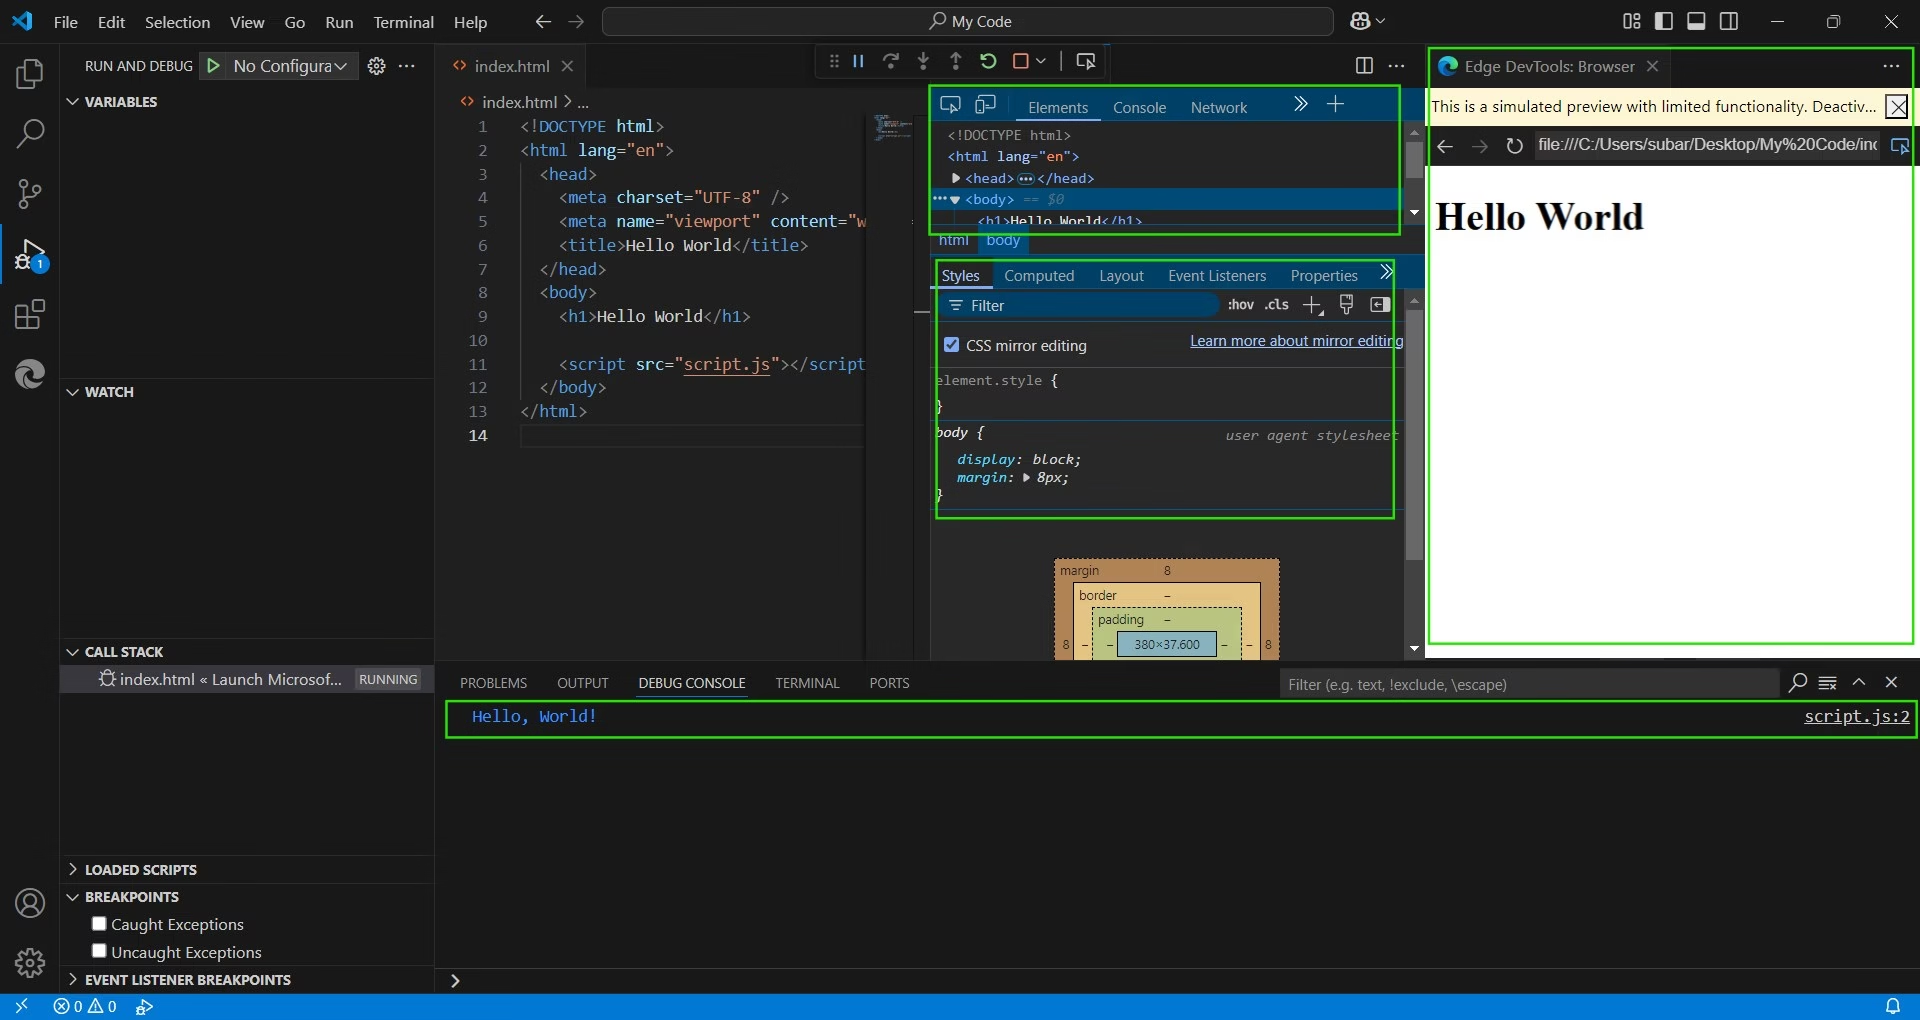
This tool will help you when you start working on your front-end or when you’re learning front-end development.
Conclusion
Here we have completed the step of our JavaScript Development Environment using VS Code. We have installed the best code editor for JavaScript Development and also set up the necessary VS Code extensions to make the development experience easier for beginners.
Although Prettier, Code Runner and Microsoft Edge Tools for VS Code are very useful VS Code extensions. You can add more in future depending on your needs. These extensions are just the basics. As you advance your JavaScript learning you’ll need more.
So in the next post of the JavaScript Tutorial Series, you’ll write your first JavaScript program called Hello World.
Get up to 85% off
Build your project using Managed VPS & Dedicated hosting and decrease your workload.
You'll get seamless migration, exceptional savings, 24/7 technical support, HIPAA compliant, PCI compliant, Multi-Level DDoS protection, 30-day money-back guarantee and more with Liquid Web.
Affiliate Disclosure: Affiliate links are available here. If you click through the affiliate links and buy something, we may get a small commission, and you'll not be charged extra.